01 · Before you start
Prepare your account, workspace, and local agent
Do not begin in a production repository. Use a dedicated demo workspace and confirm that your account can access OpenAI Tunnels and custom ChatGPT plugins.
- Windows 10/11 and the latest PatchWarden Desktop
- A ChatGPT account that can use custom Plugins/Apps
- A dedicated project folder, not a drive root, home folder, Desktop, Downloads, or Documents
- At least one signed-in Codex CLI, Claude Code, or OpenCode installation
- Tunnels Read + Use permission in your OpenAI organization
Core handles guarded tasks, verification, and audit. Direct provides more immediate file operations and should be enabled separately after you understand its permission boundary.
02 · Local setup
Install PatchWarden and choose a safe workspace
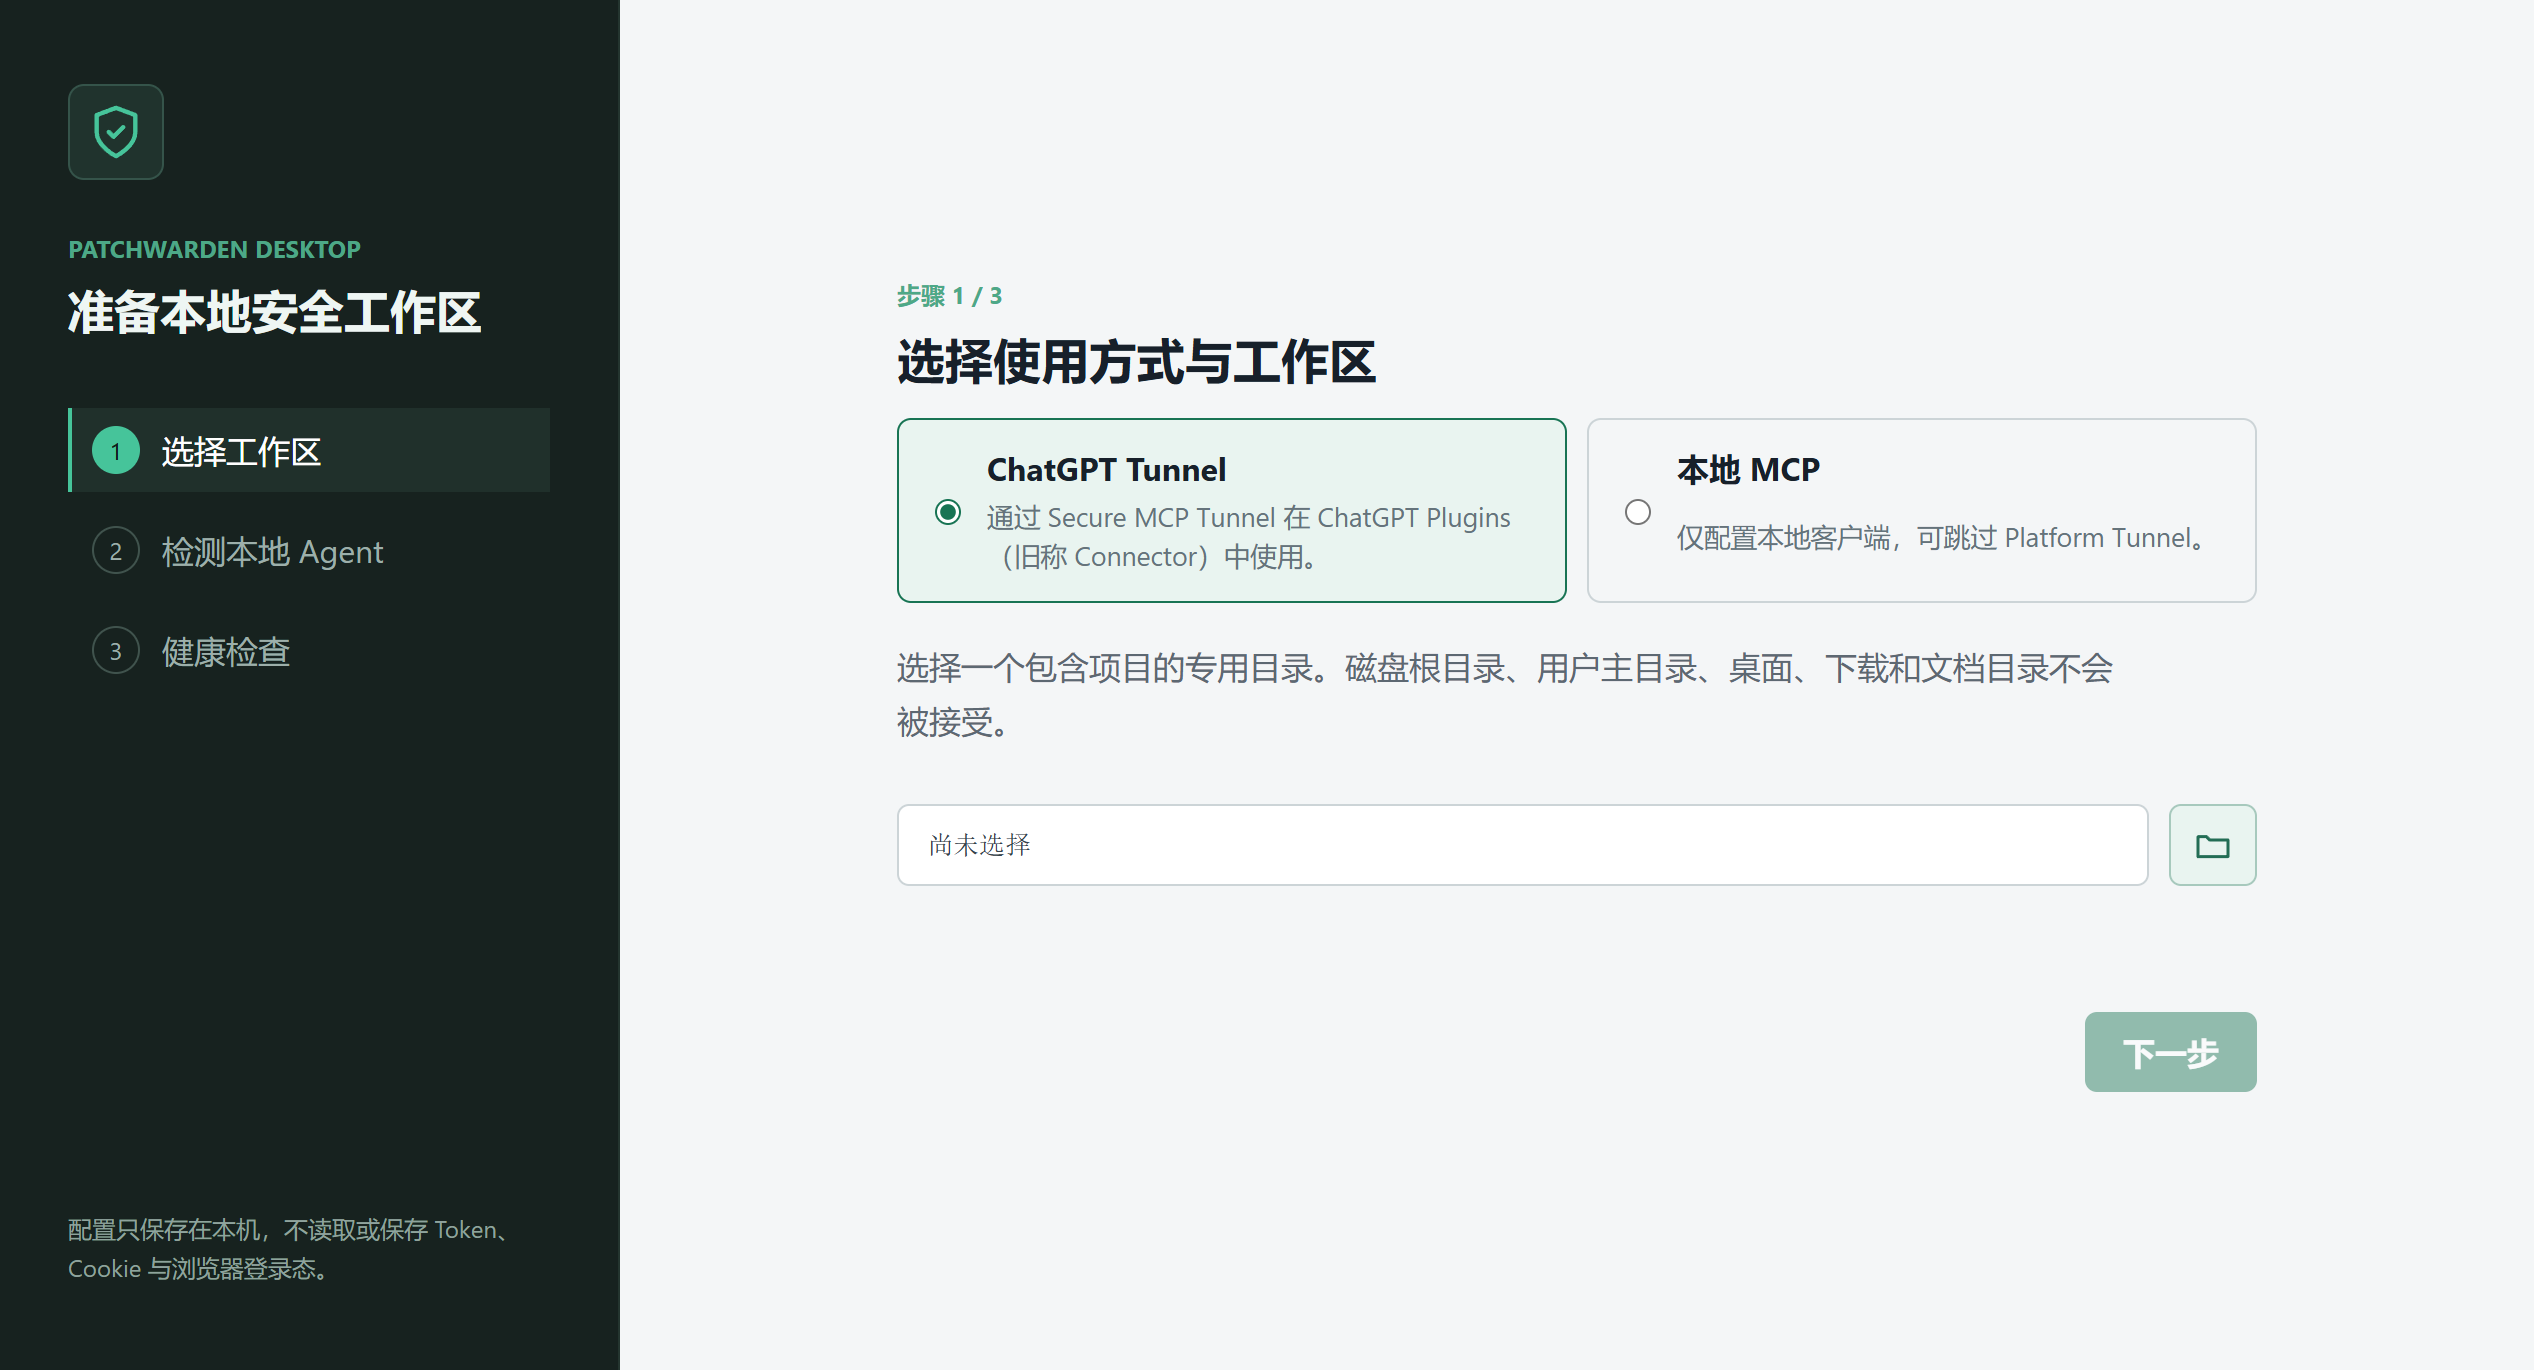
Choose ChatGPT Tunnel during onboarding. PatchWarden confines tasks to the dedicated project directory you select.
- 1
Download and run the latest desktop installer.
- 2
Choose ChatGPT Tunnel; choose Local MCP only for a completely local client workflow.
- 3
Use the folder button to select your dedicated demo workspace.
- 4
Open Settings → Local agents and models and confirm that at least one agent is available.
- 5
If an agent exits immediately, run its CLI directly, finish sign-in, and detect it again in PatchWarden.
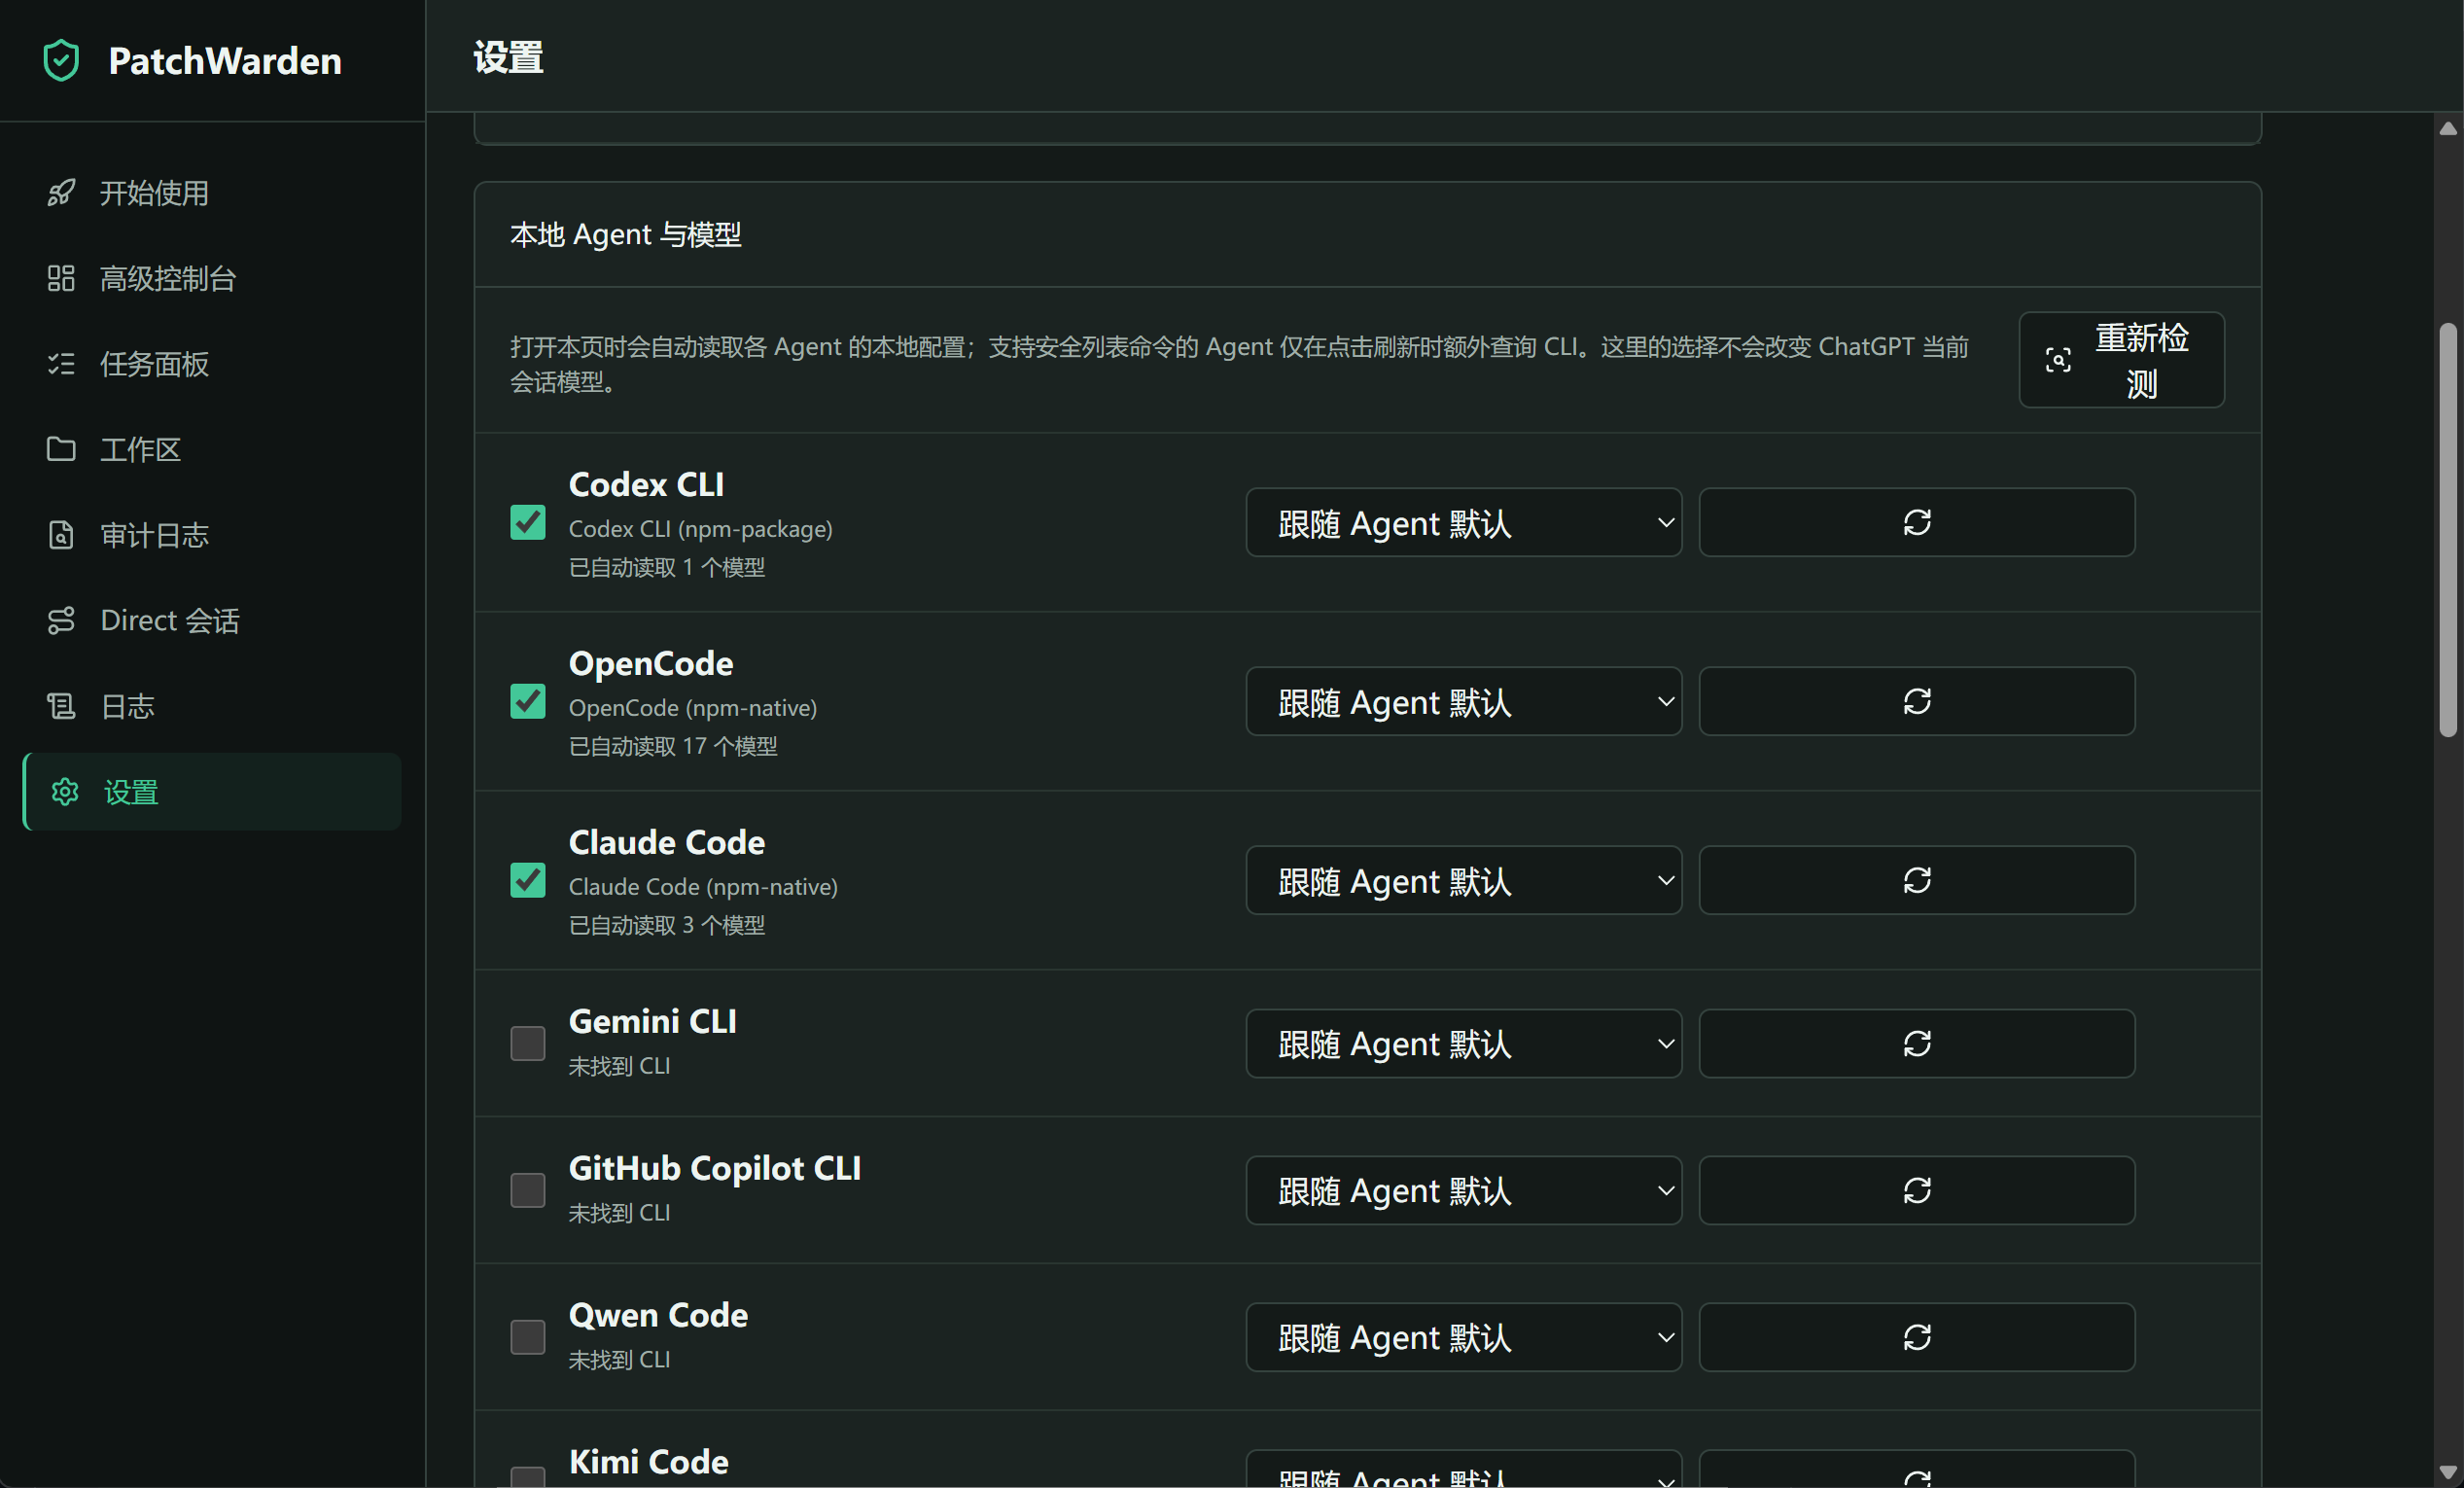
Detecting a CLI does not guarantee that its account is ready. Check CLI sign-in, permissions, and model configuration first.
The current Windows installer is not code-signed, so SmartScreen can show an unknown-publisher warning. Verify the download against the SHA-256 file from the same release before installing.
03 · Tunnel
Create a runtime key and connect the Core tunnel
Create a dedicated tunnel runtime key. It is shown in full only once. Store it securely and never put it in screenshots, prompts, README files, or repositories.
- Create a dedicated secret on the Organization API keys page.
- Confirm that its principal has Tunnels Read + Use.
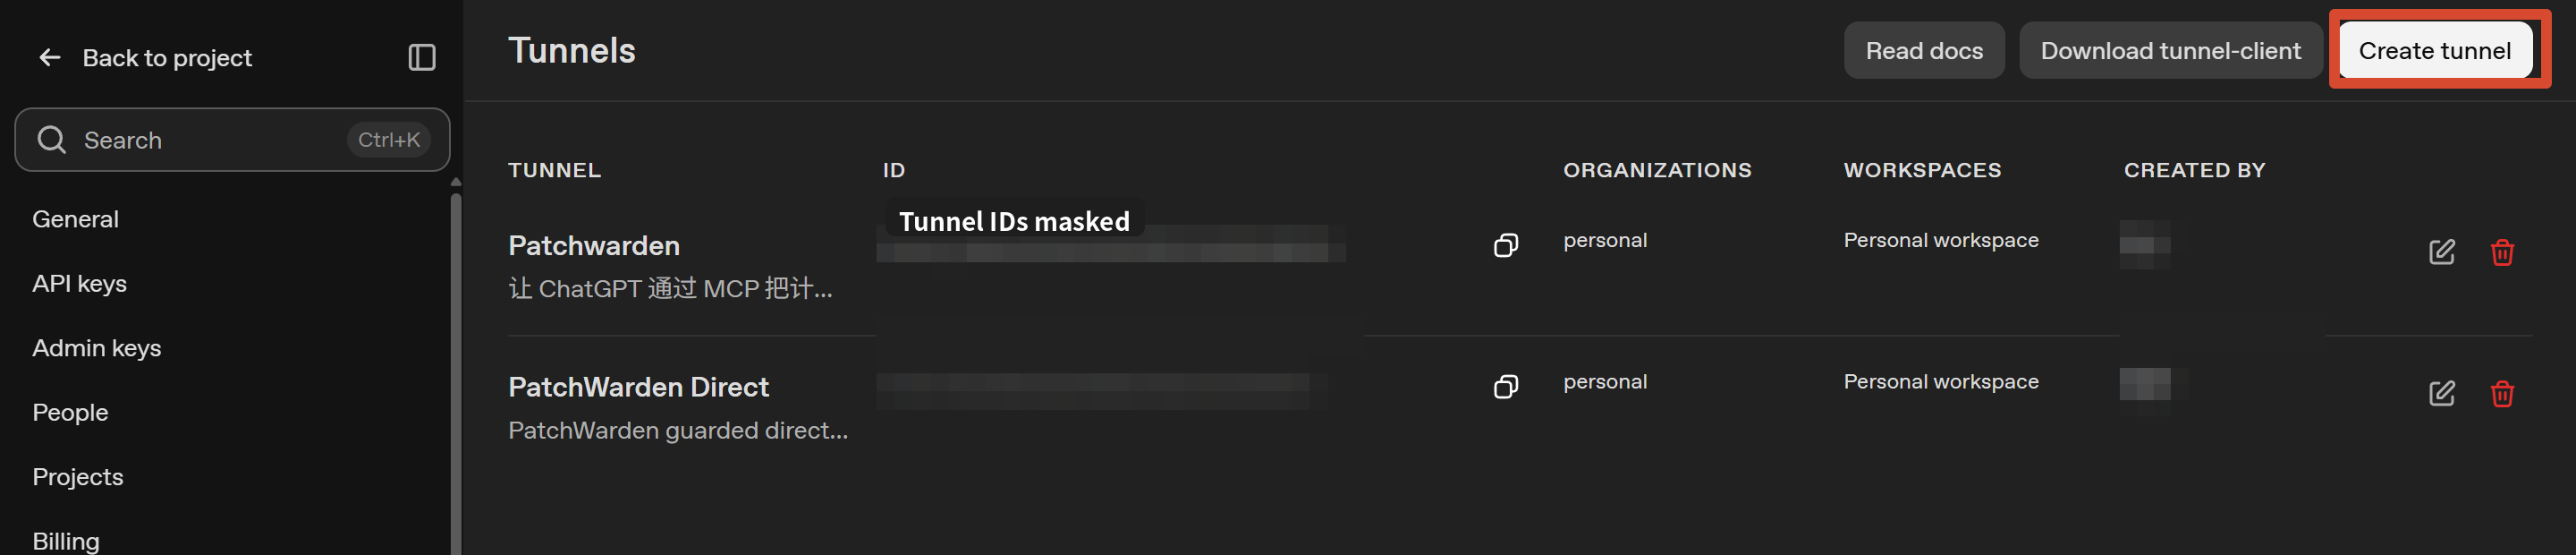
- Create the PatchWarden (Core) tunnel and save the full tunnel ID.
- If you need Direct, create a separate PatchWarden Direct tunnel.
- Download the supported tunnel-client from the Tunnels page.
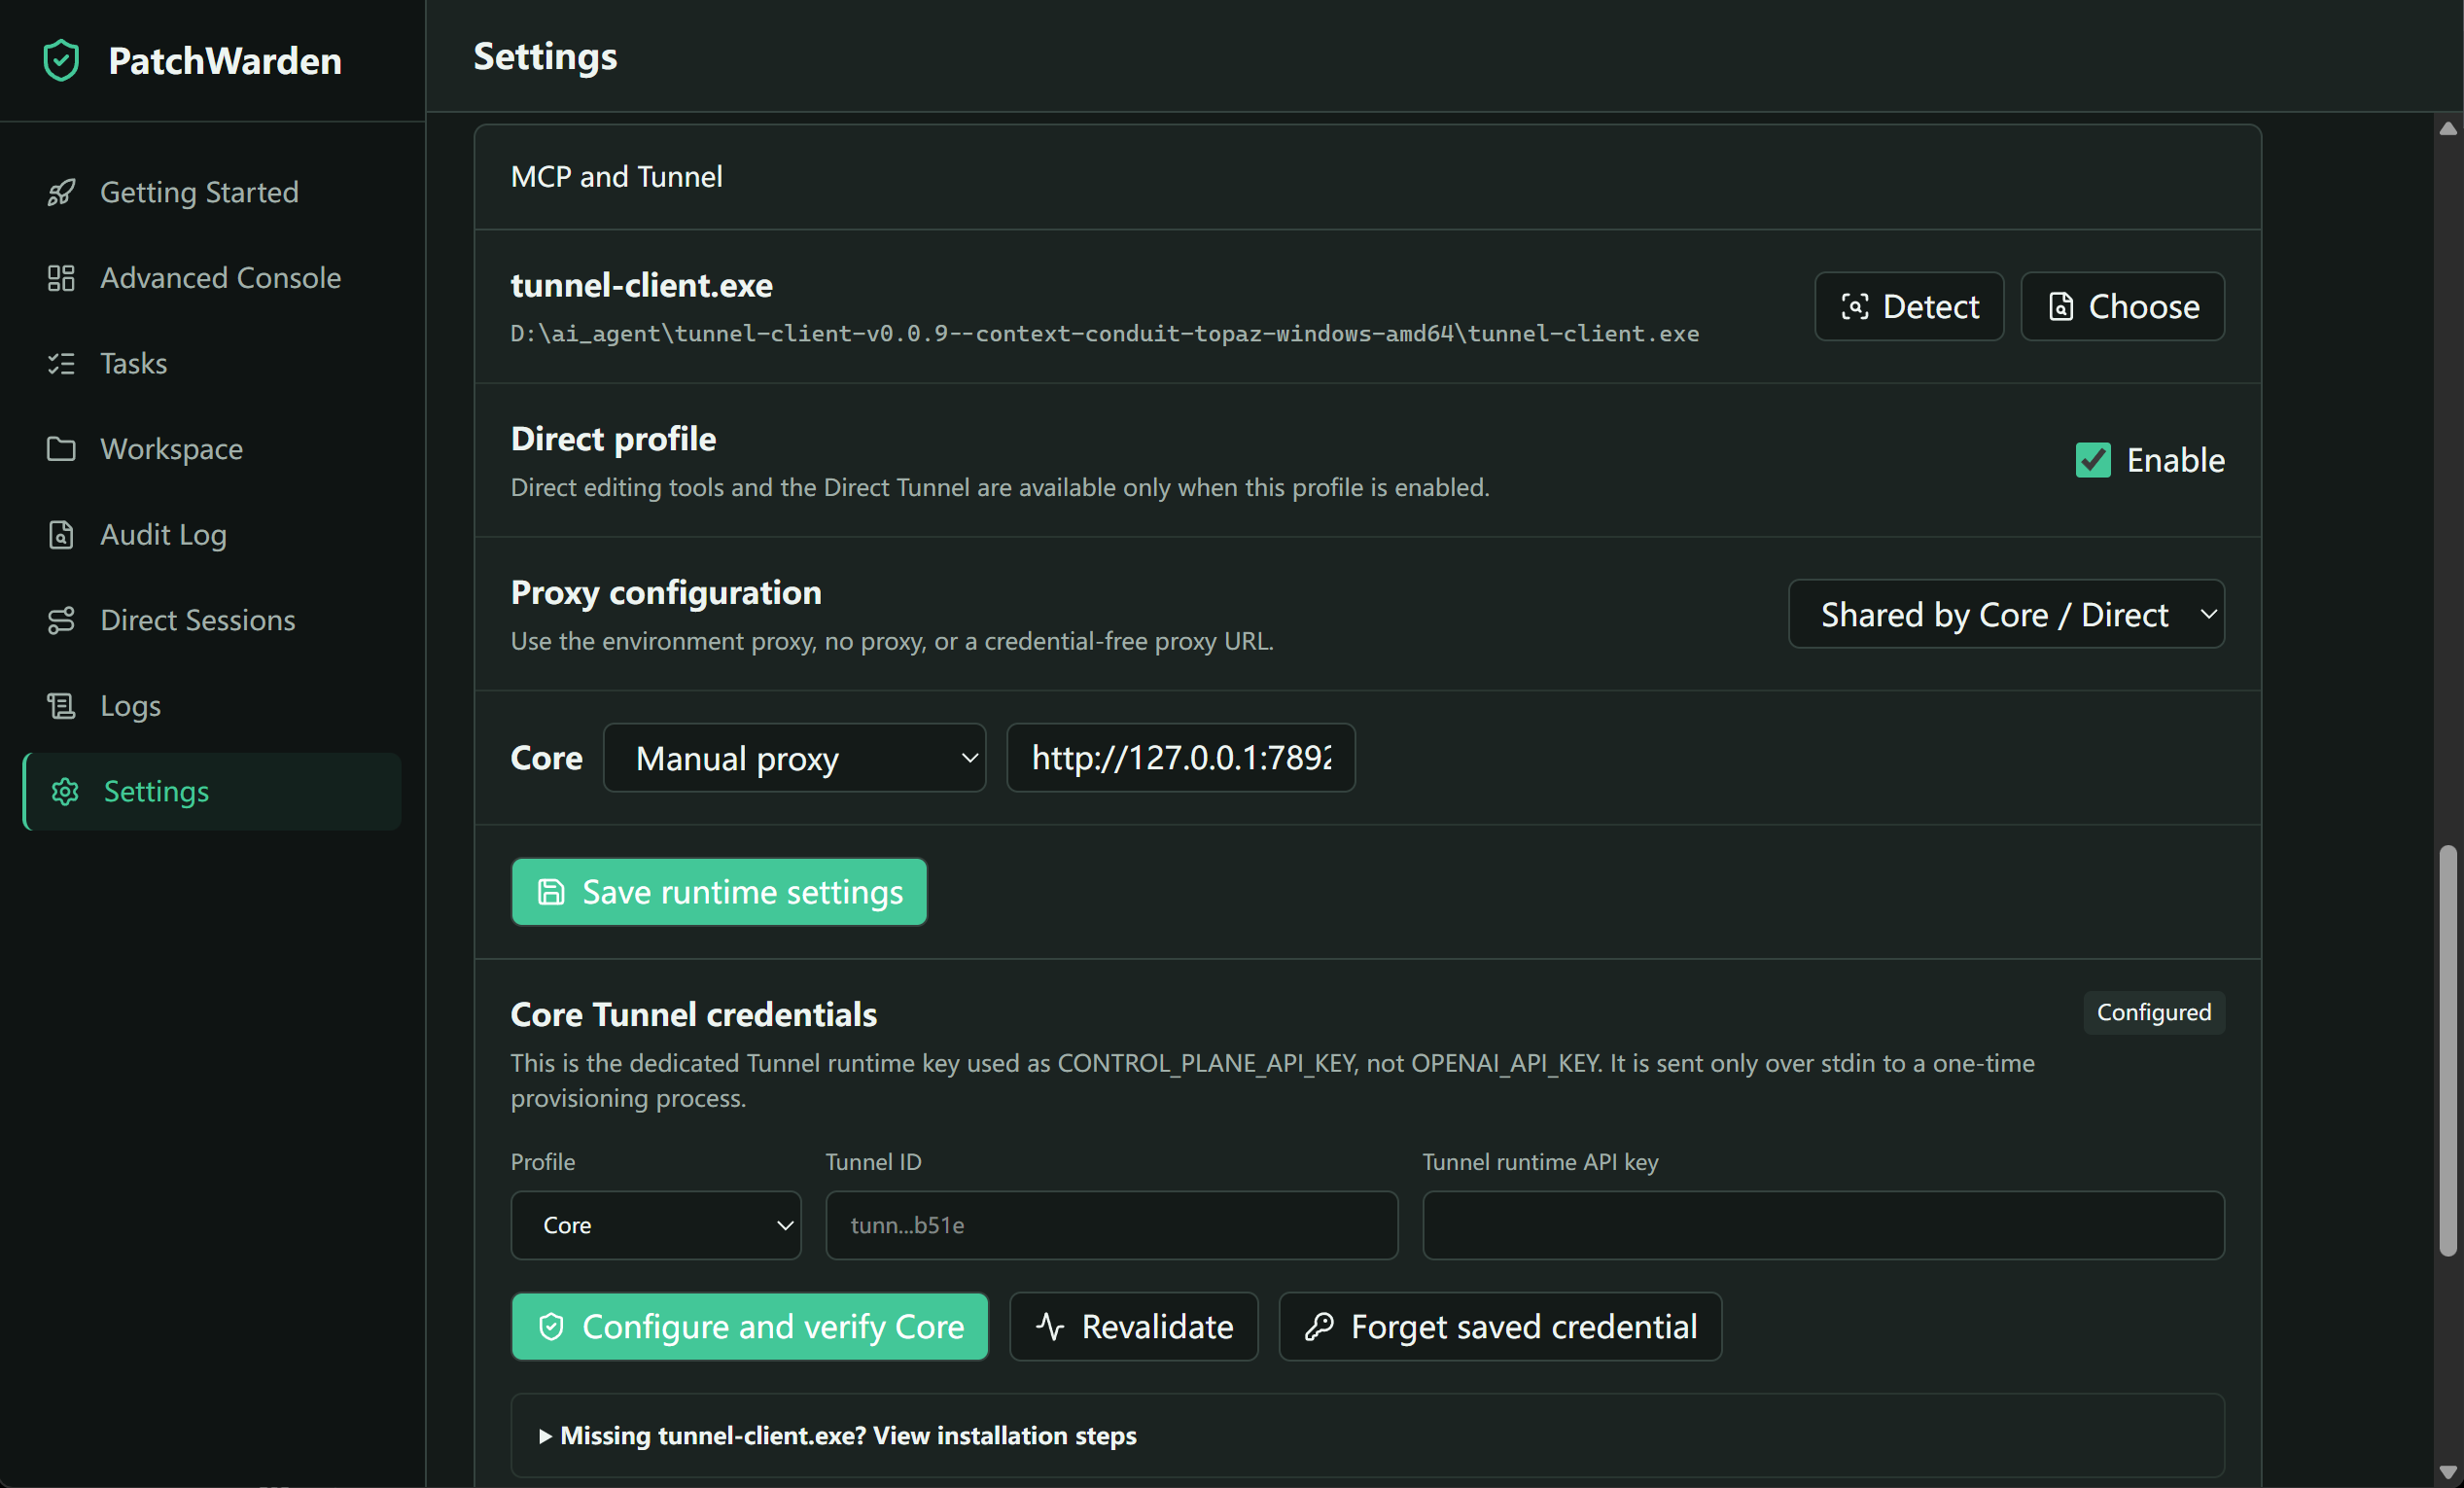
- Open Settings → MCP and Tunnel and locate tunnel-client.exe.
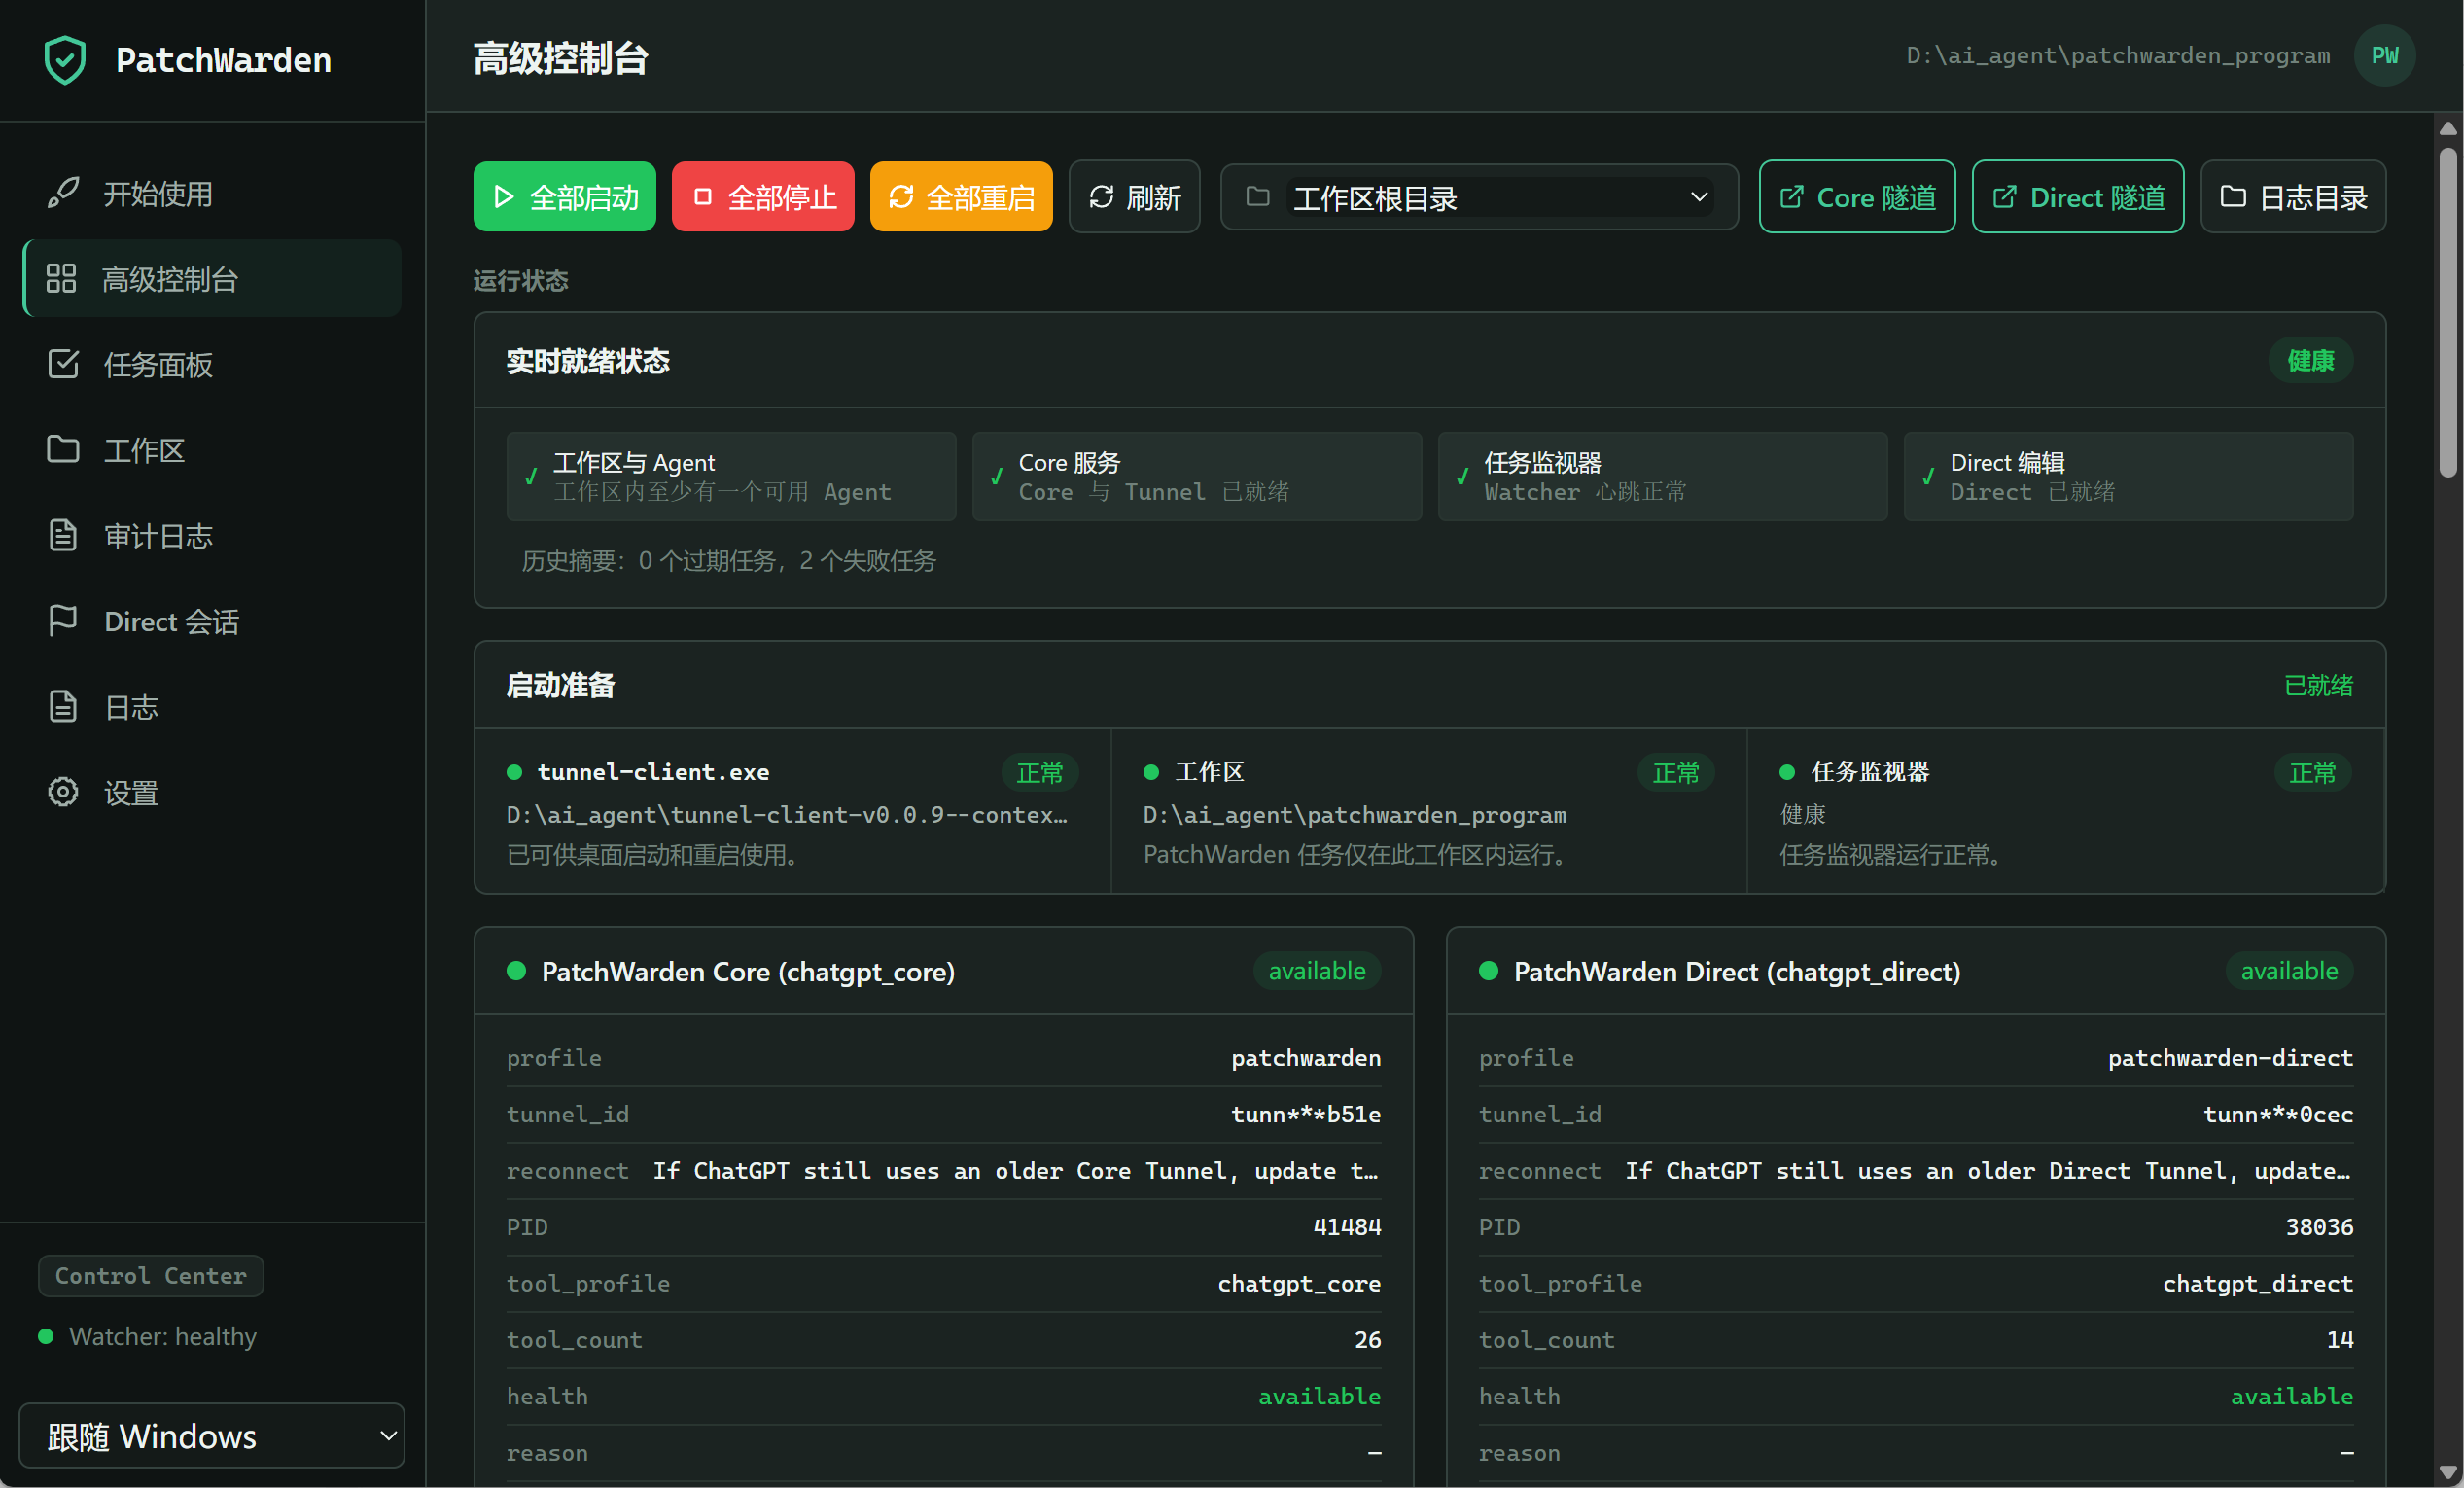
- Enter the Core tunnel ID and runtime key, then Configure and verify Core.
- Enable Direct only when needed and configure its profile separately.
- Choose no proxy when none is required; never put credentials in a local proxy URL.
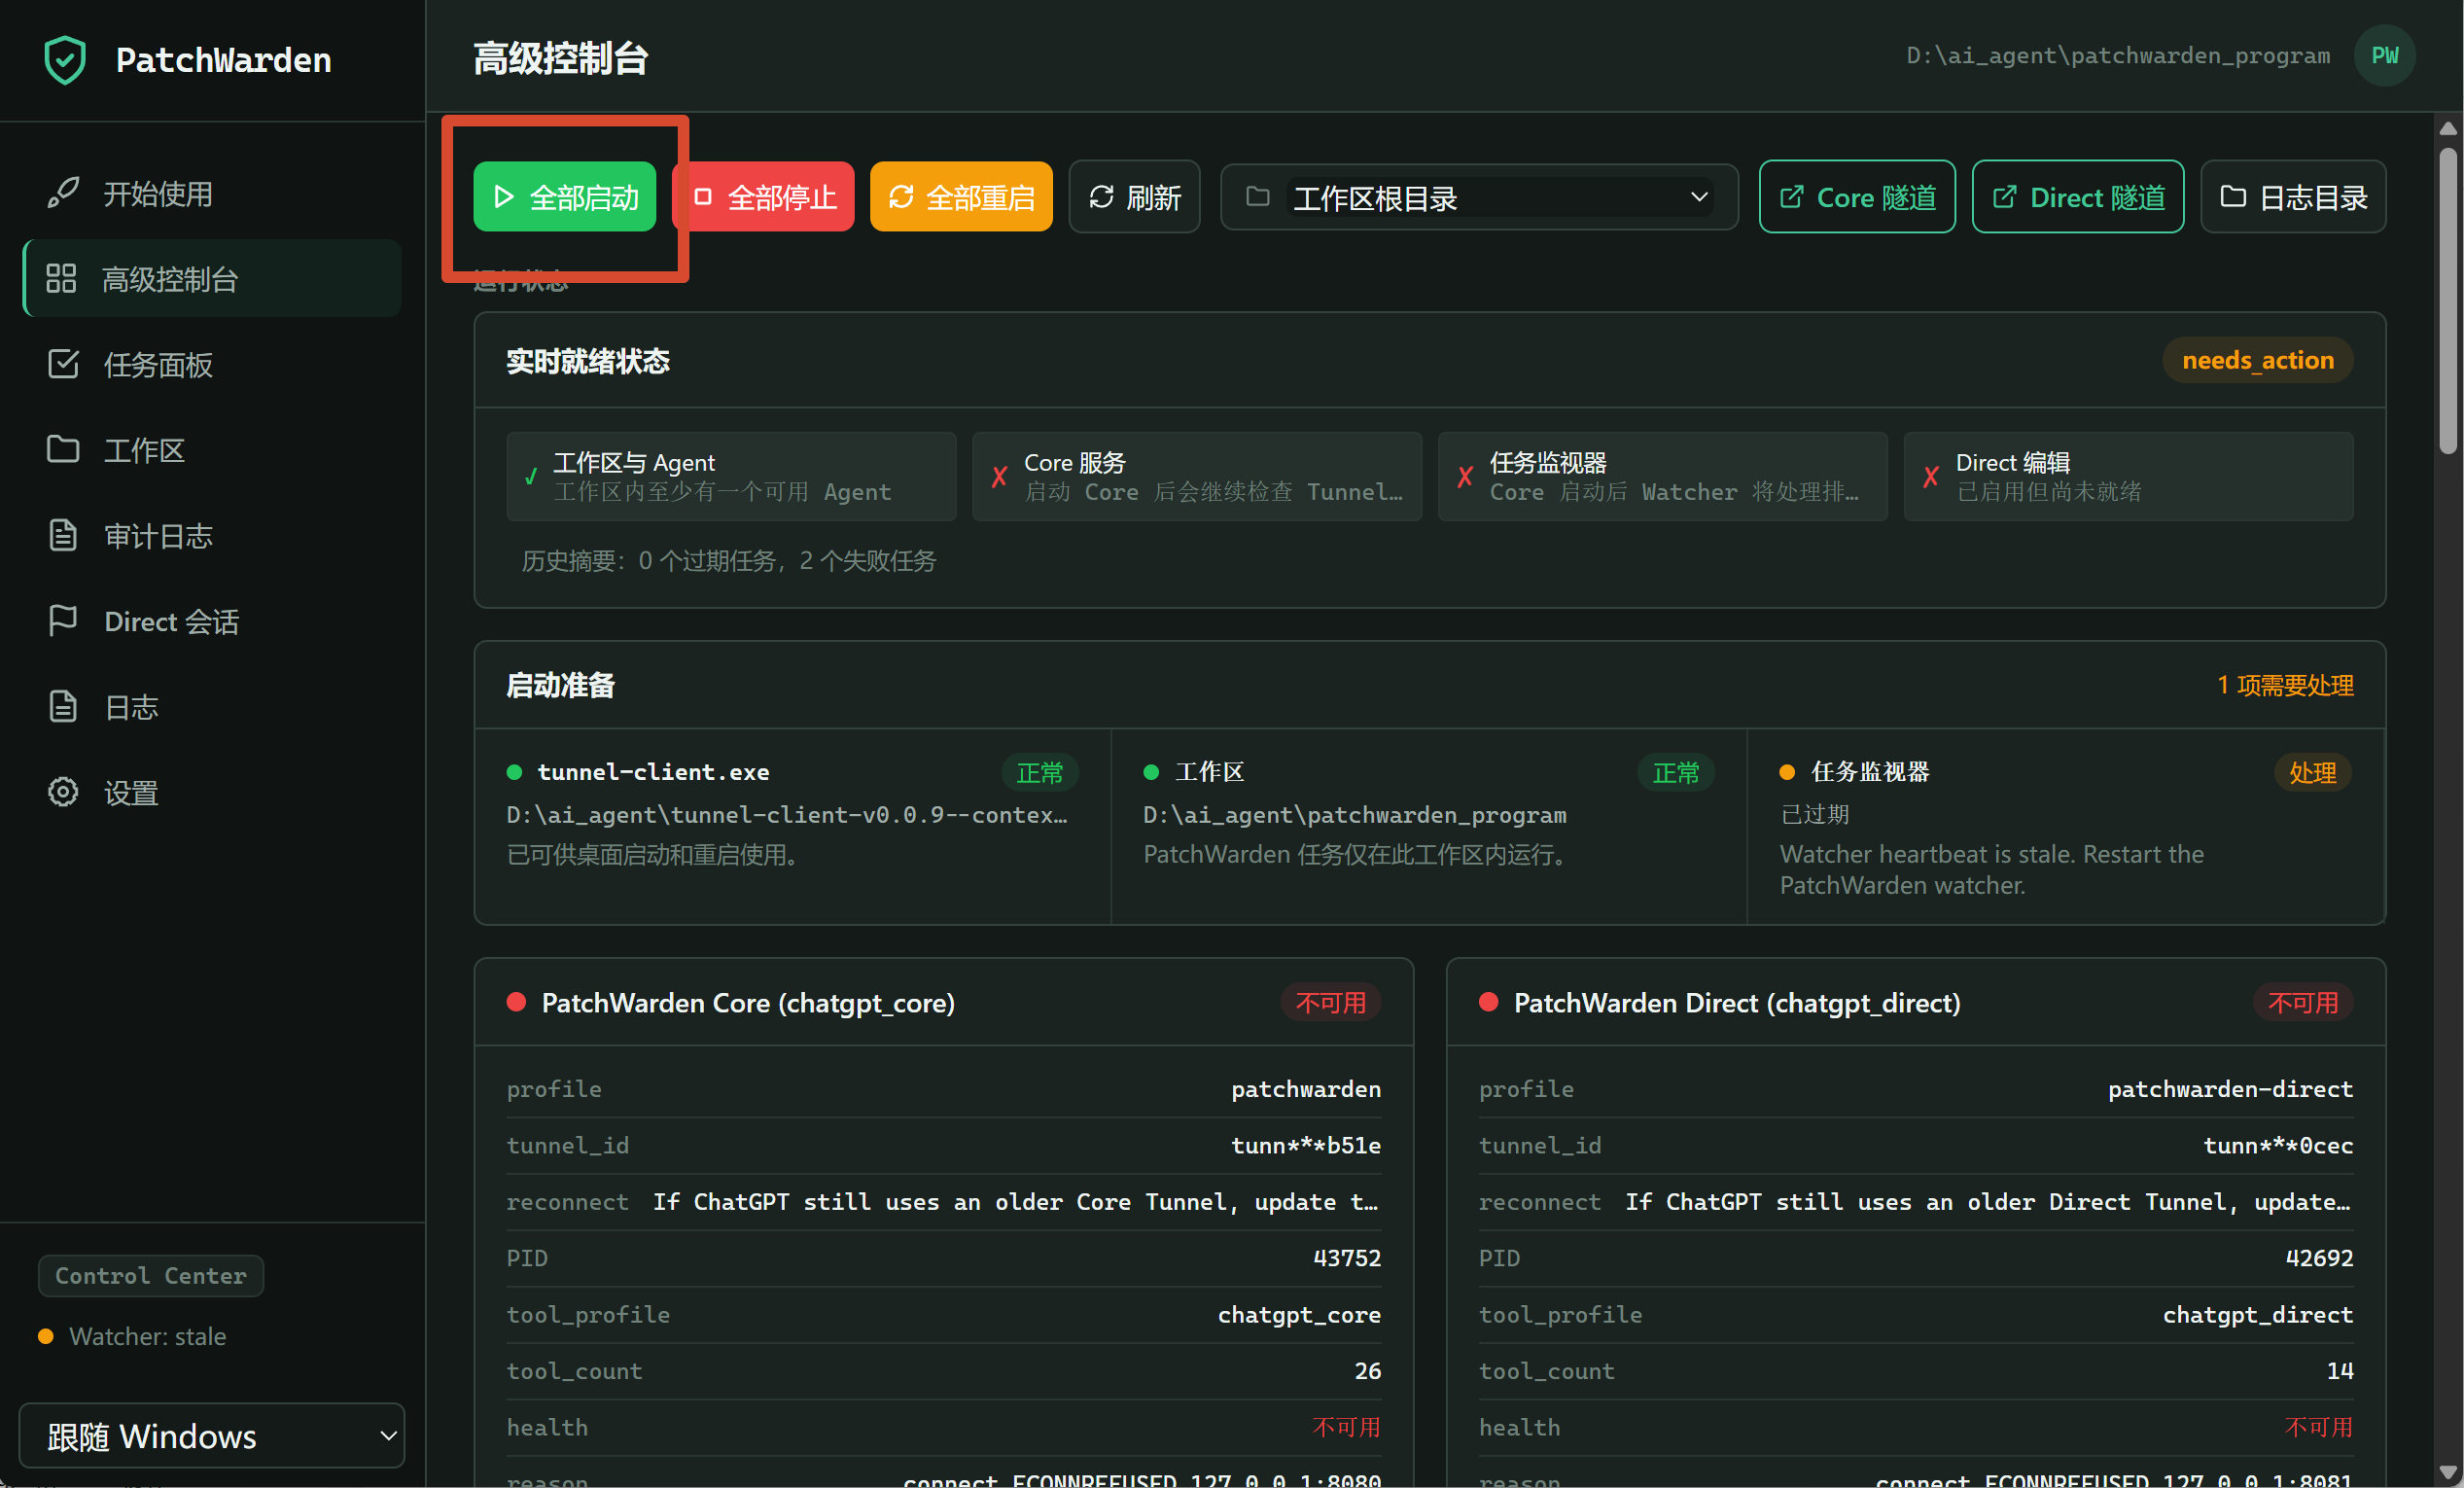
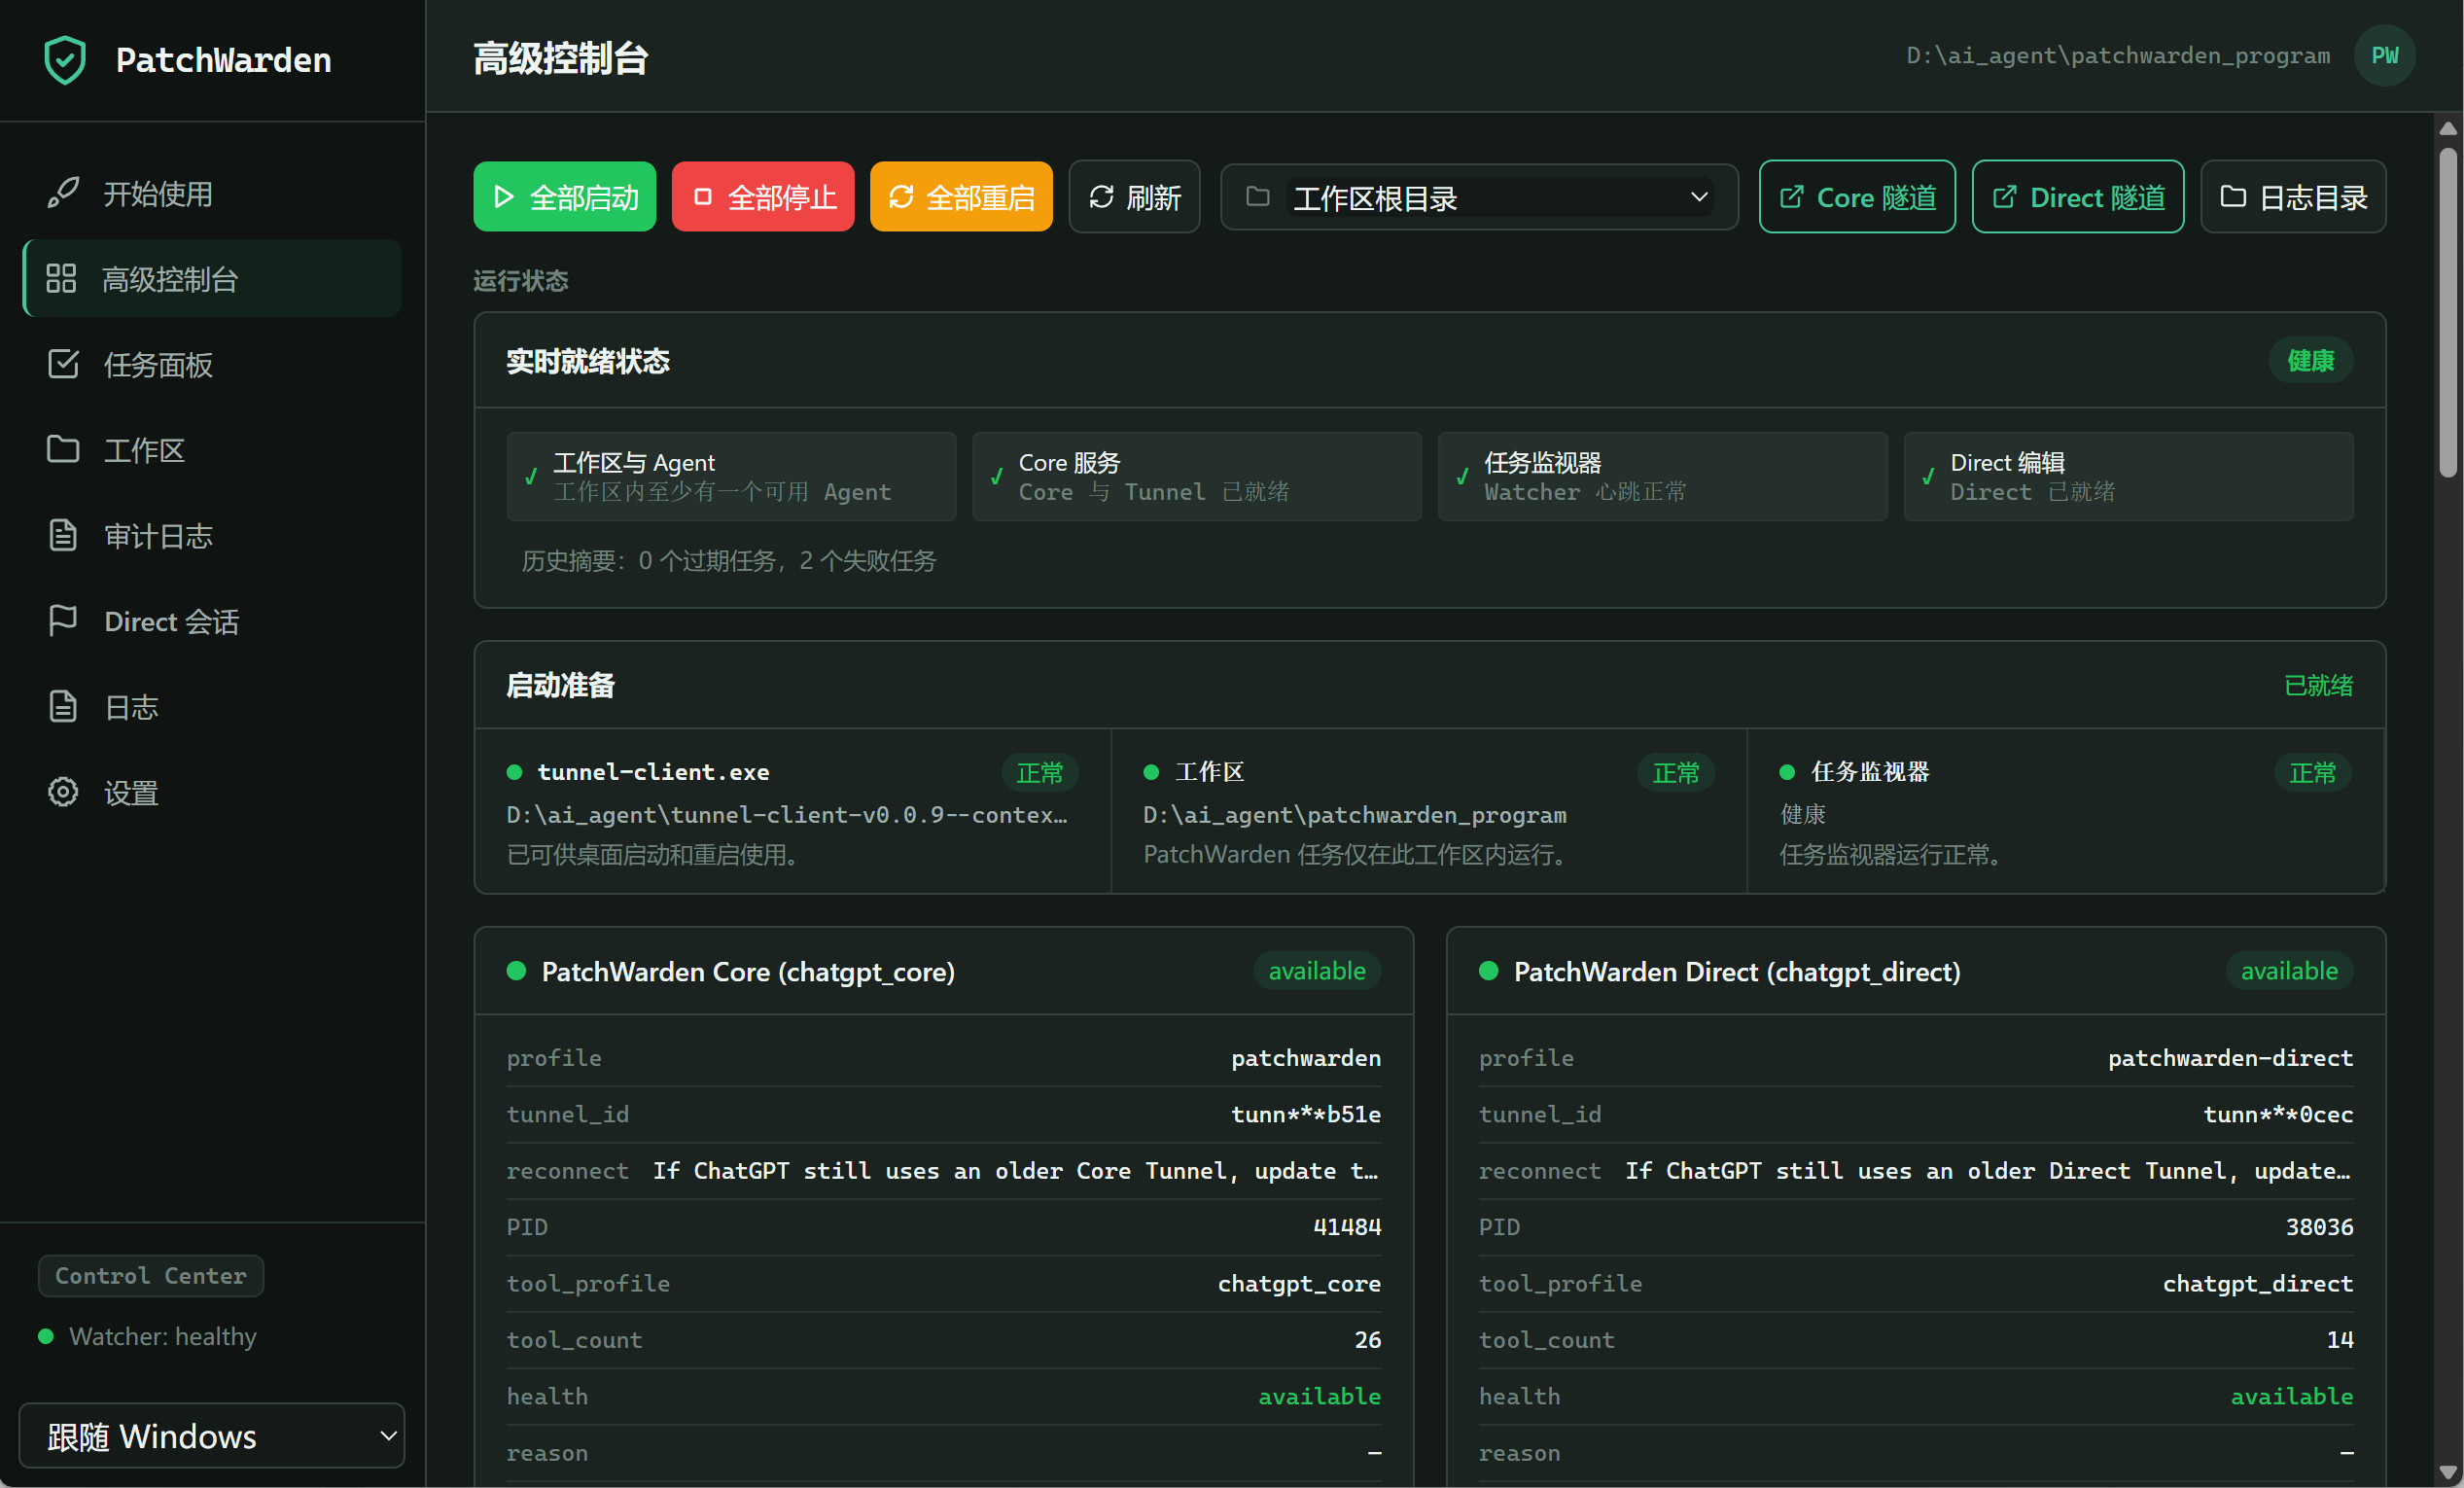
- Open Advanced Console, select Start all, and wait until Core, Watcher, and Tunnel are healthy.
PatchWarden Tunnel uses the runtime key mapped to CONTROL_PLANE_API_KEY, not a general OPENAI_API_KEY. OPENAI_ADMIN_KEY is for tunnel administration and should not be a long-lived runtime key.

04 · ChatGPT
Enable developer mode and create separate plugins
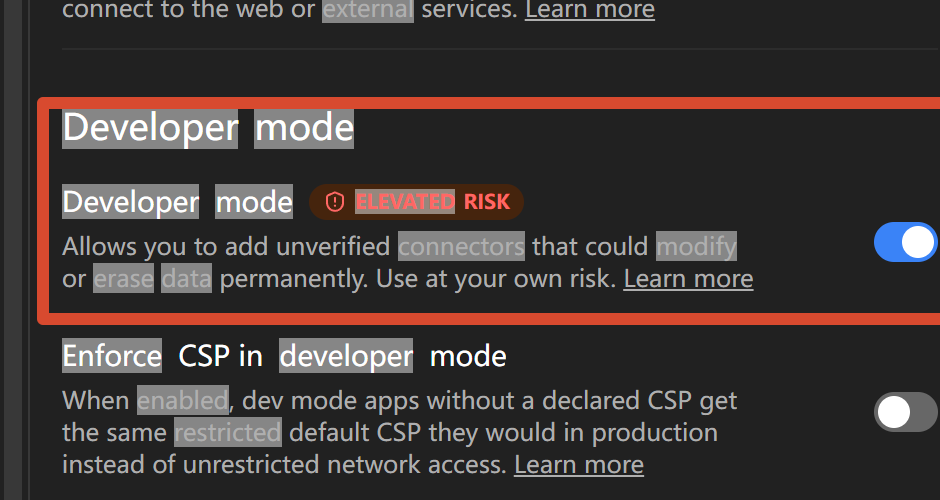
The UI may say Plugins, Apps, or the older Connectors. Developer mode allows unreviewed custom MCP servers, so connect only your own PatchWarden instance.
- 1
Open ChatGPT Settings → Plugins/Apps (older releases may say Connectors).
- 2
Find Developer mode, review the warning, and enable it.
- 3
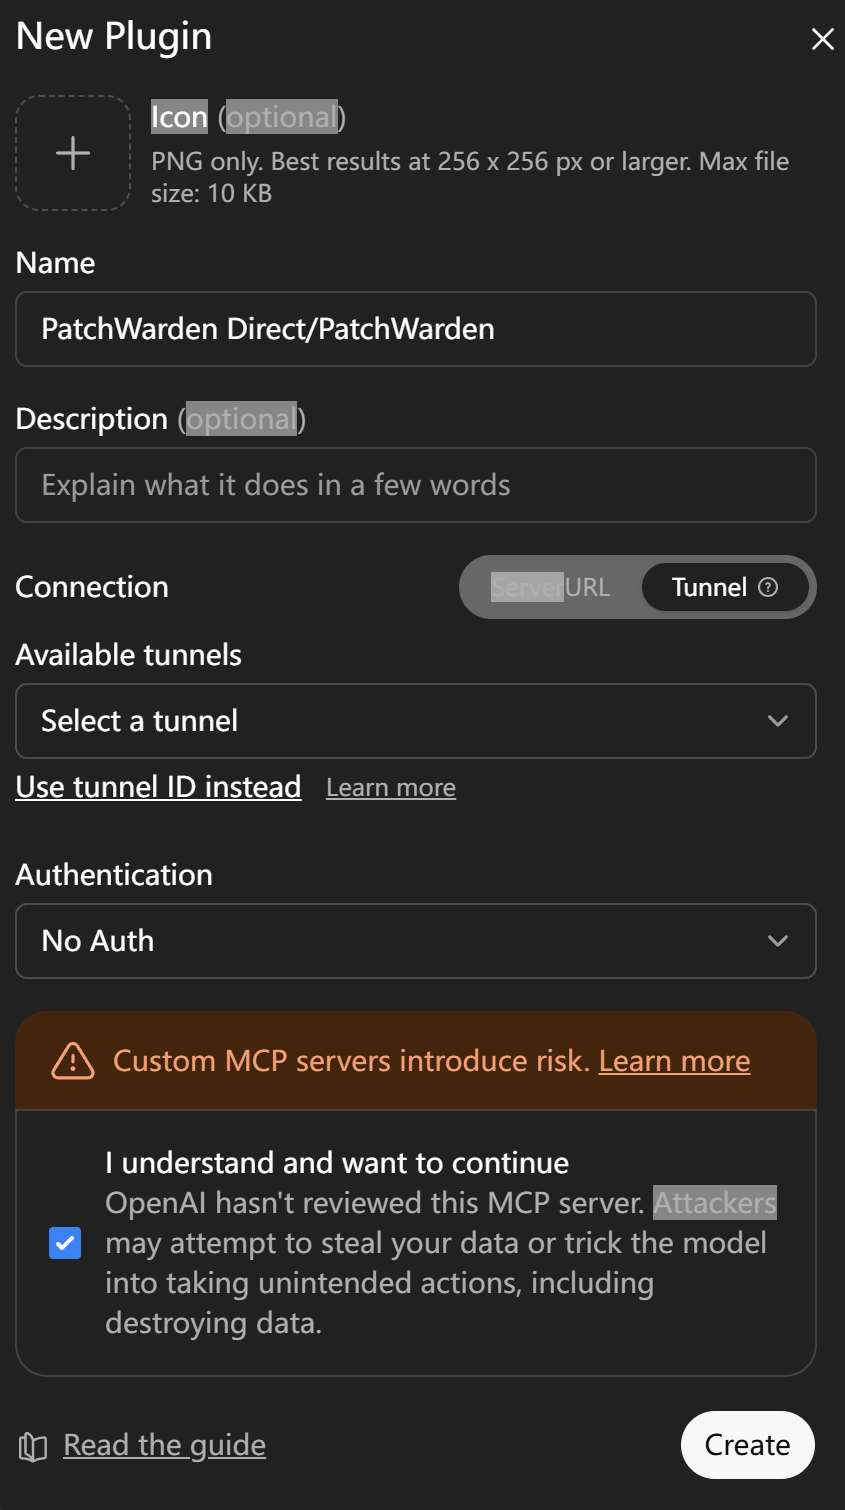
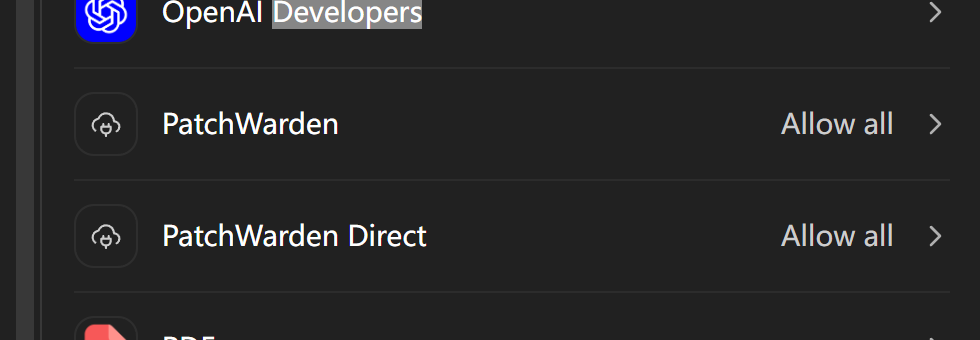
Create PatchWarden: select Tunnel, choose the Core tunnel, and set Authentication to No Auth.
- 4
If needed, create PatchWarden Direct separately and select the Direct tunnel with No Auth.
- 5
For daily use, retain confirmation prompts for Direct, file changes, and high-risk actions.
This setting asks whether the MCP server needs another OAuth/Bearer layer. PatchWarden is already reached through Secure MCP Tunnel and does not add plugin OAuth here. Never paste the runtime key into Authentication.
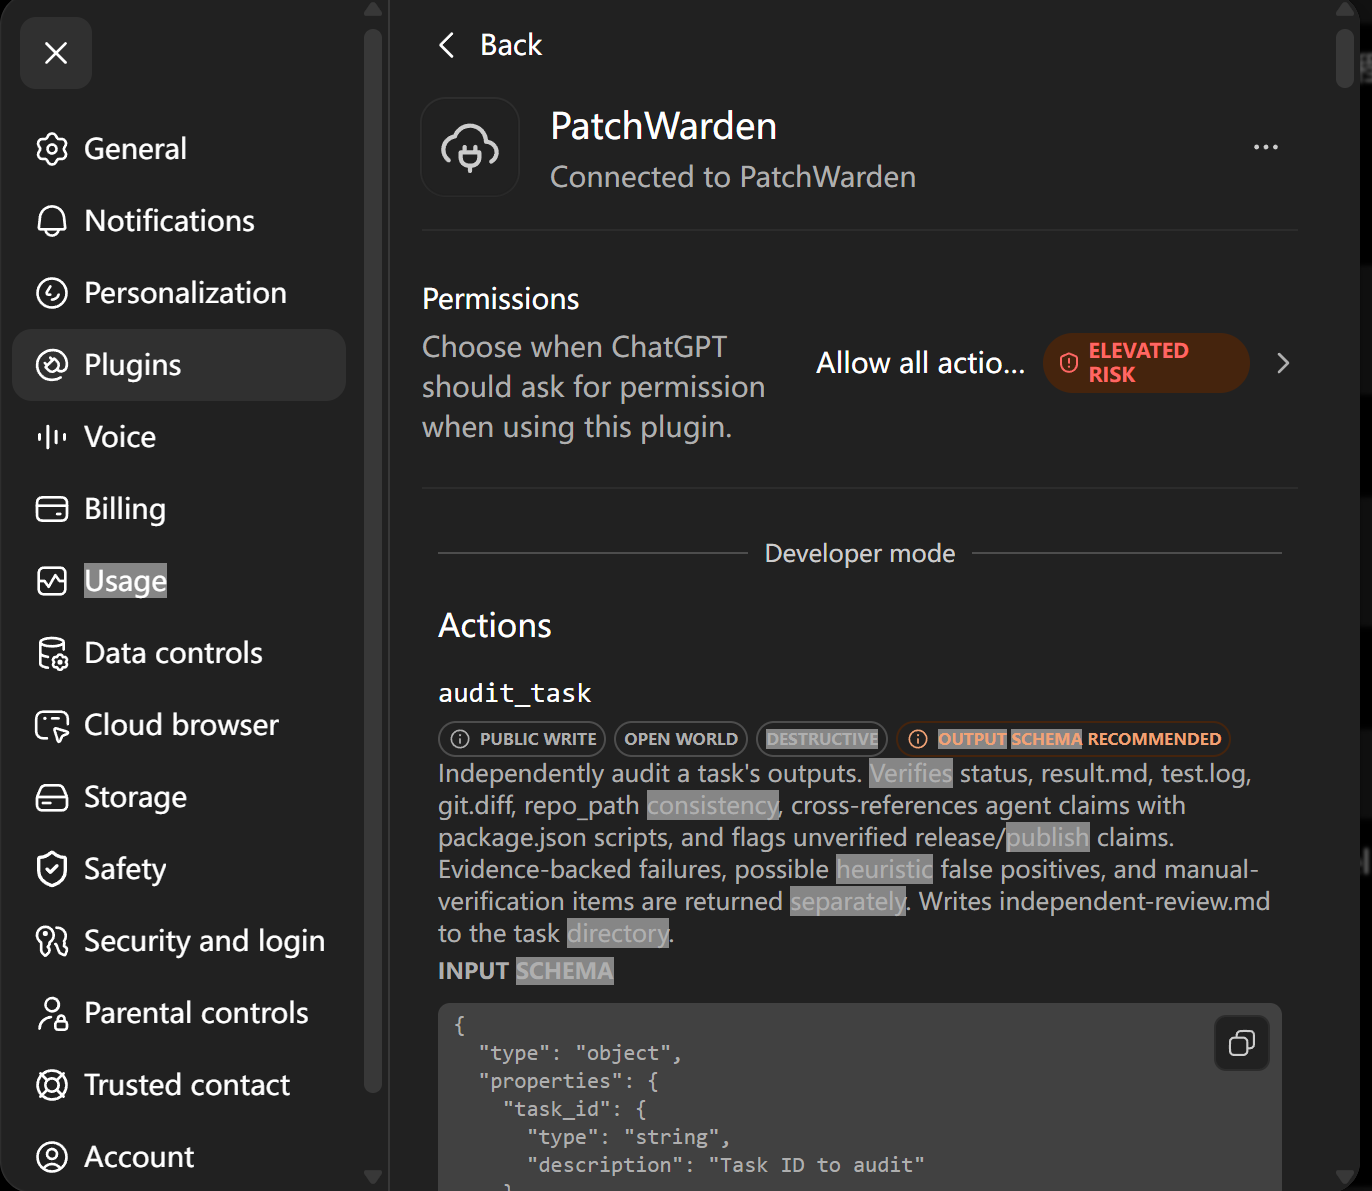
health_check
First connection check
Open a new ChatGPT conversation, select @PatchWarden and optional @PatchWarden Direct, then run this read-only check.
@PatchWarden @PatchWarden Direct
Call these tools in order:
1. health_check
2. list_agents

Return server_version, watcher.status, Core/Direct tool_profile, tool_count,
and all agents with invocation_ready=true. Do not modify any files.
Seeing old tools after an upgrade? Refresh both plugins
Old ChatGPT conversations can retain a cached catalog after PatchWarden is upgraded. Refresh PatchWarden and PatchWarden Direct separately, then open a new chat and call health_check again.
Check server_version, tool_profile, tool_count, catalog_consistent, watcher.status, and tool_manifest_sha256.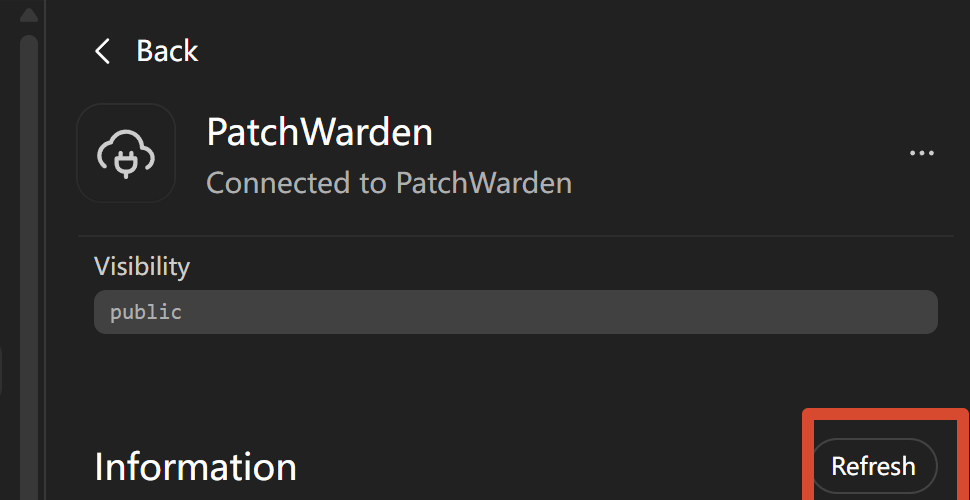
05 · First task
Run a read-only demo before a modifying task
First prove the connection, agent, and real test command without changing or publishing anything. Expand scope only after the closed loop is healthy.
Real workflow demo
53-second highlight · sensitive information masked@PatchWarden @PatchWarden Direct
Run a read-only connectivity test in my demo workspace:
1. Call health_check
2. Call list_agents
3. Select an agent with invocation_ready=true
4. Read only README.md and package.json
5. Run the real npm test script that exists in package.json
6. Do not modify files, commit, push, tag, publish, release, or deploy
7. Return task_id, lineage_id, verification, audit, and changed_files_totalRun only a verification script that actually exists in package.json. If npm test is absent, report the available scripts instead of guessing.
06 · Acceptance
Do not trust “done”; inspect the evidence
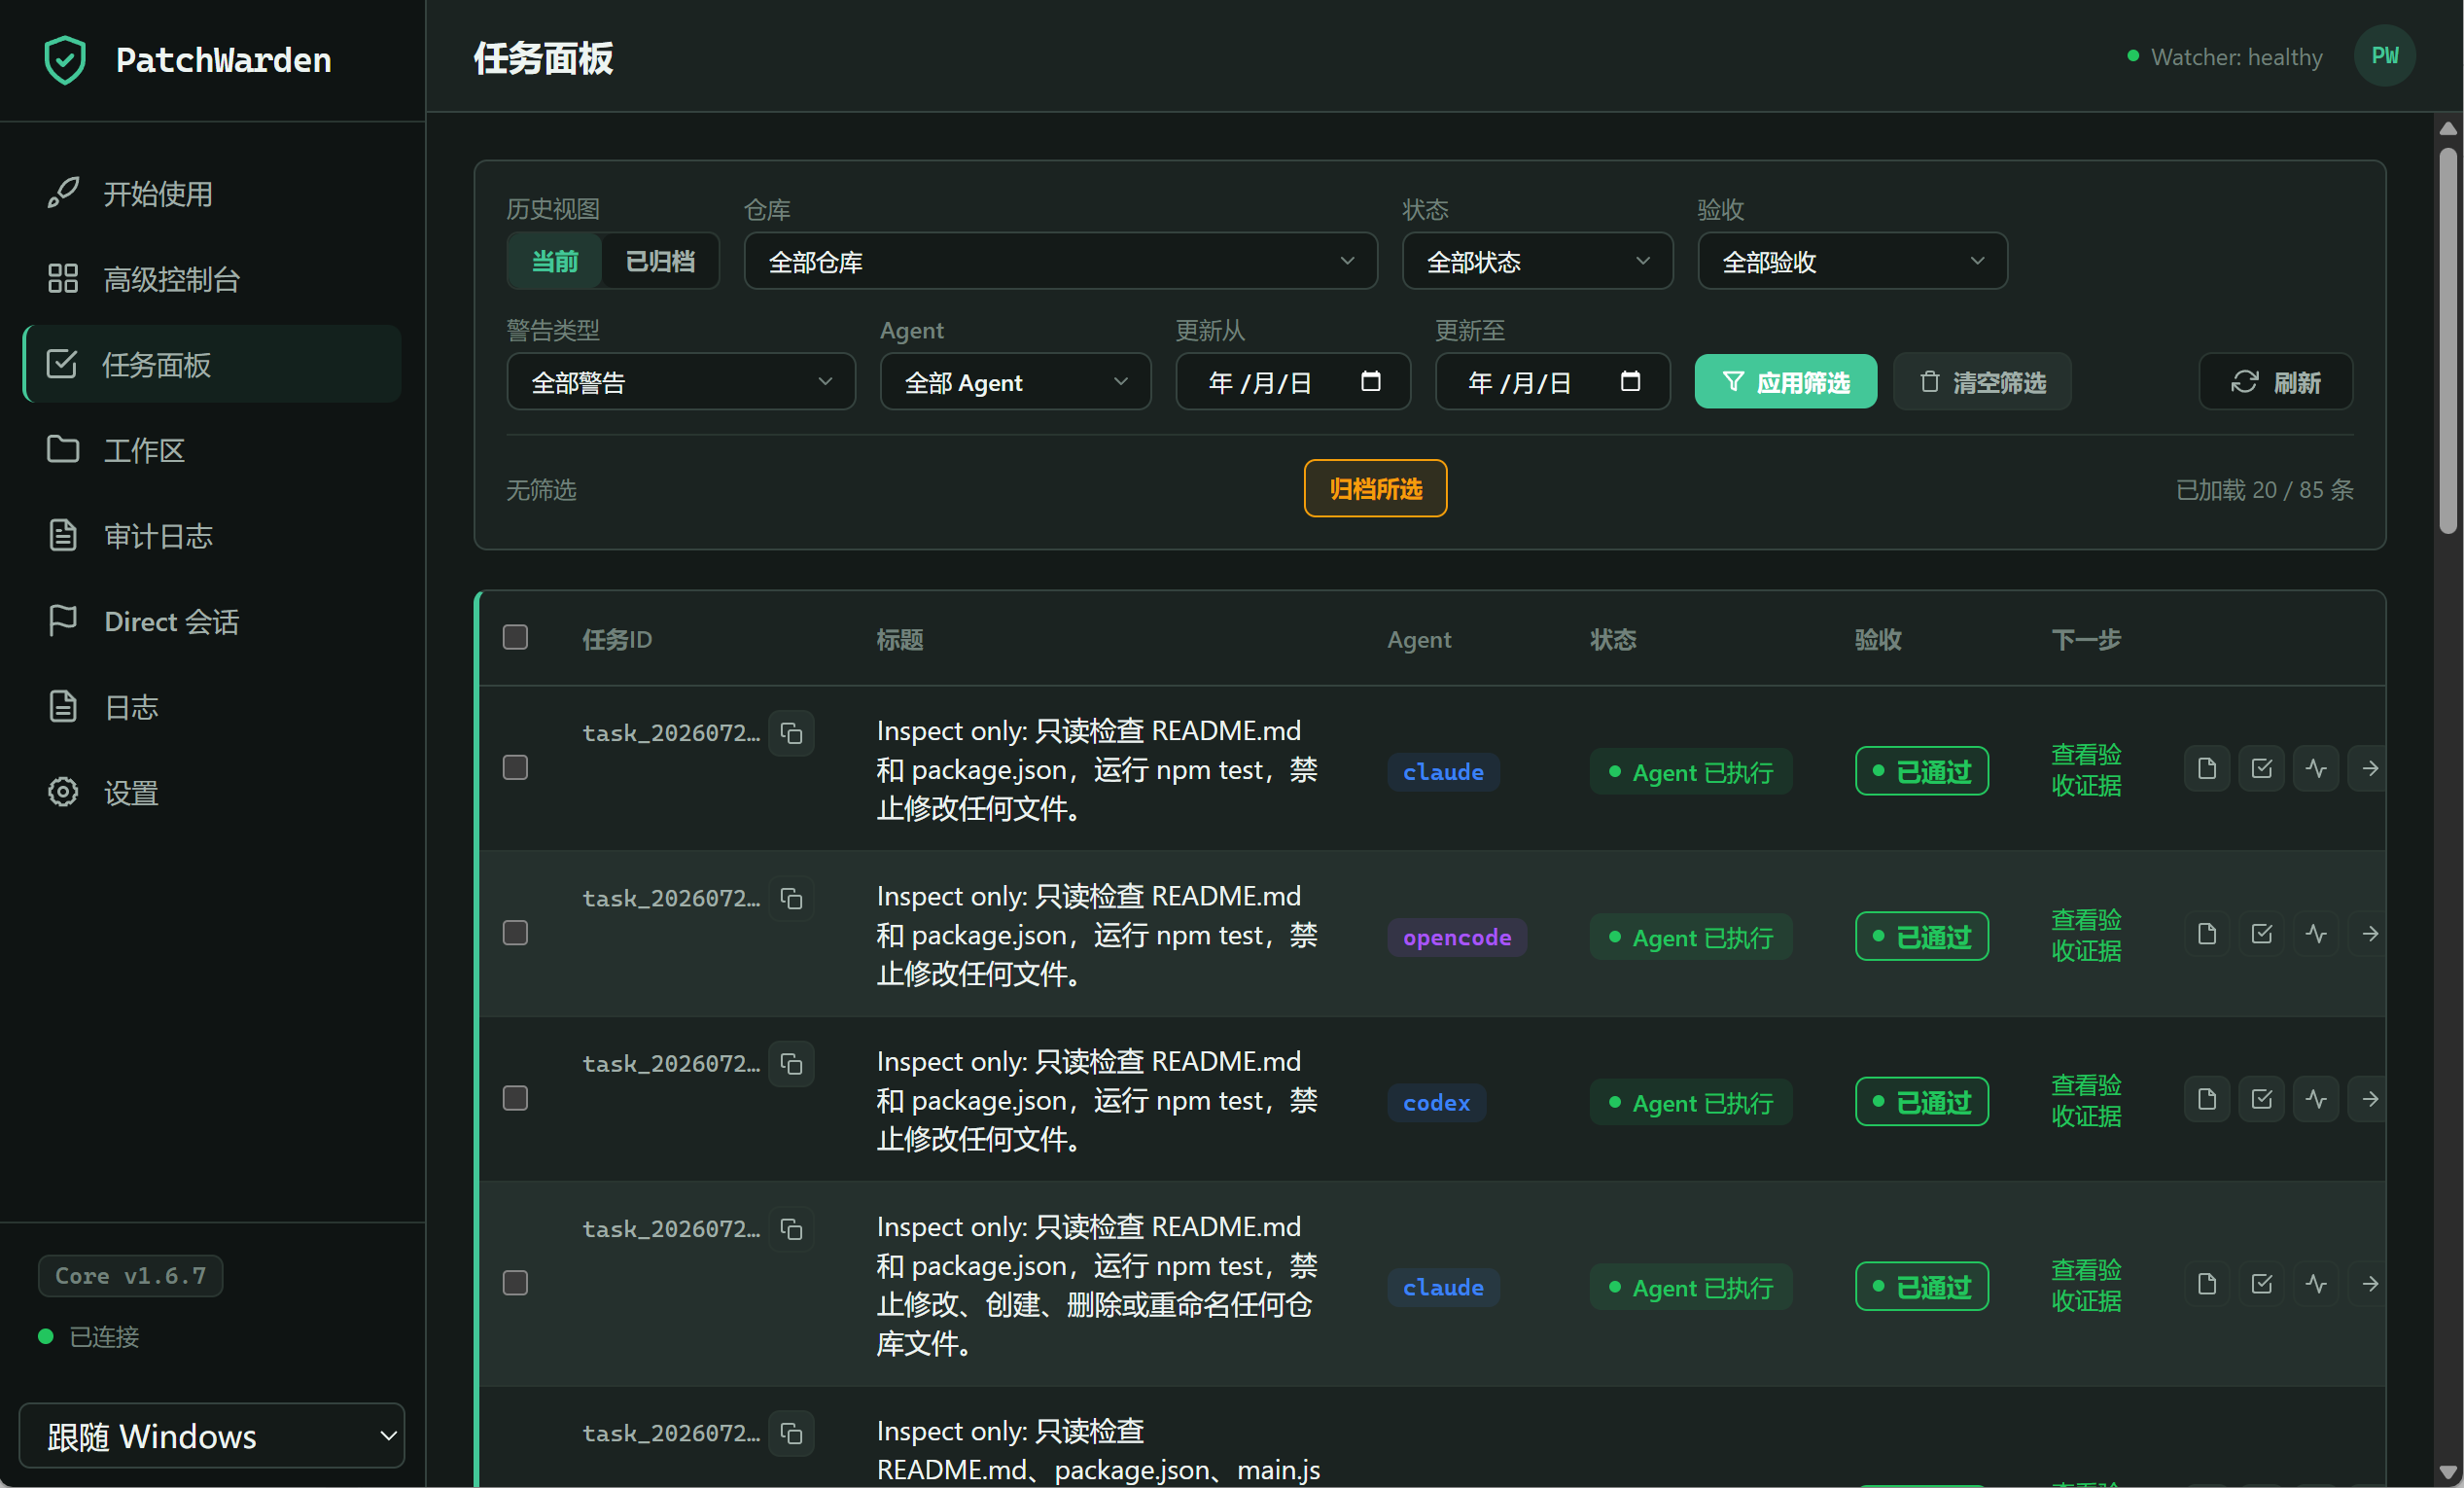
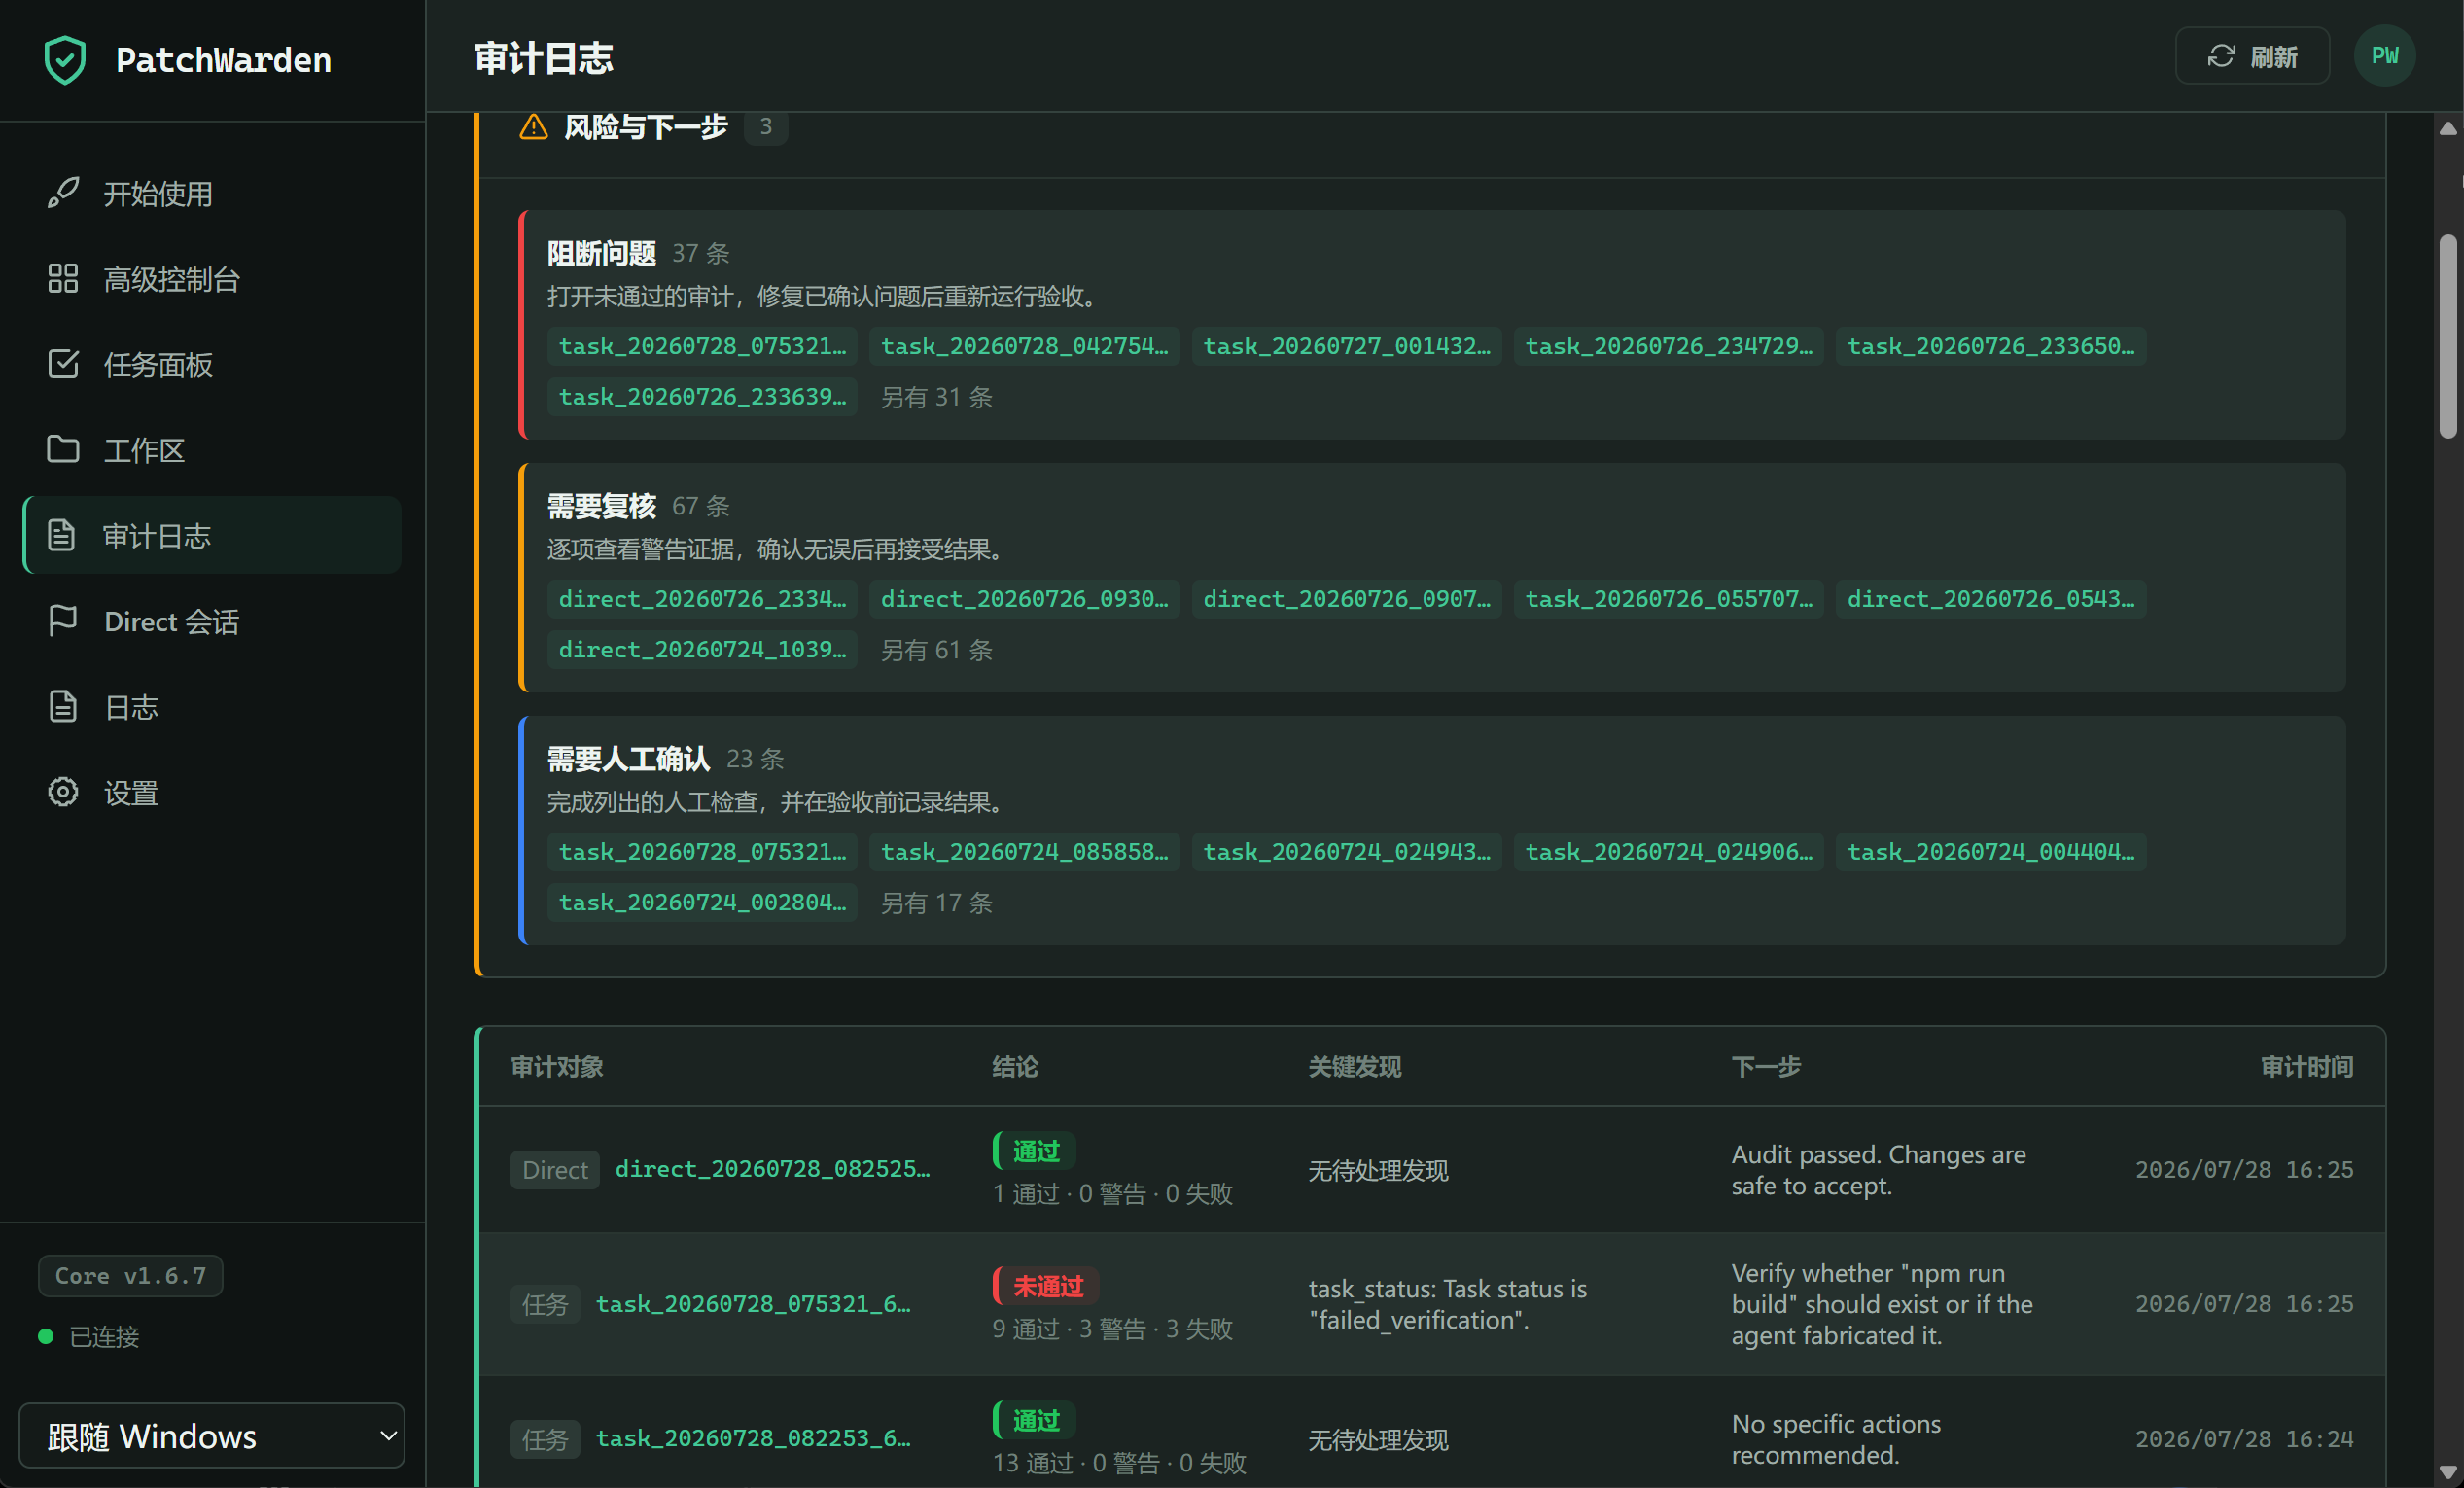
An agent process ending only means it stopped. Completion still requires independent verification, a scope check, an audit verdict, and the final lineage state.
- task_id / lineage_id
- Unique task and workflow evidence
- verification passed
- The real verification command succeeded
- changed_files_total
- Number of files actually changed
- out_of_scope_changes_total
- Out-of-scope changes; expected to be 0
- audit ACCEPTED
- Independent audit accepted the result
- lineage accepted
- The workflow reached its accepted state
07 · Troubleshooting
The five most common problems
Identify the unhealthy link before acting. Do not force-kill unknown PIDs.
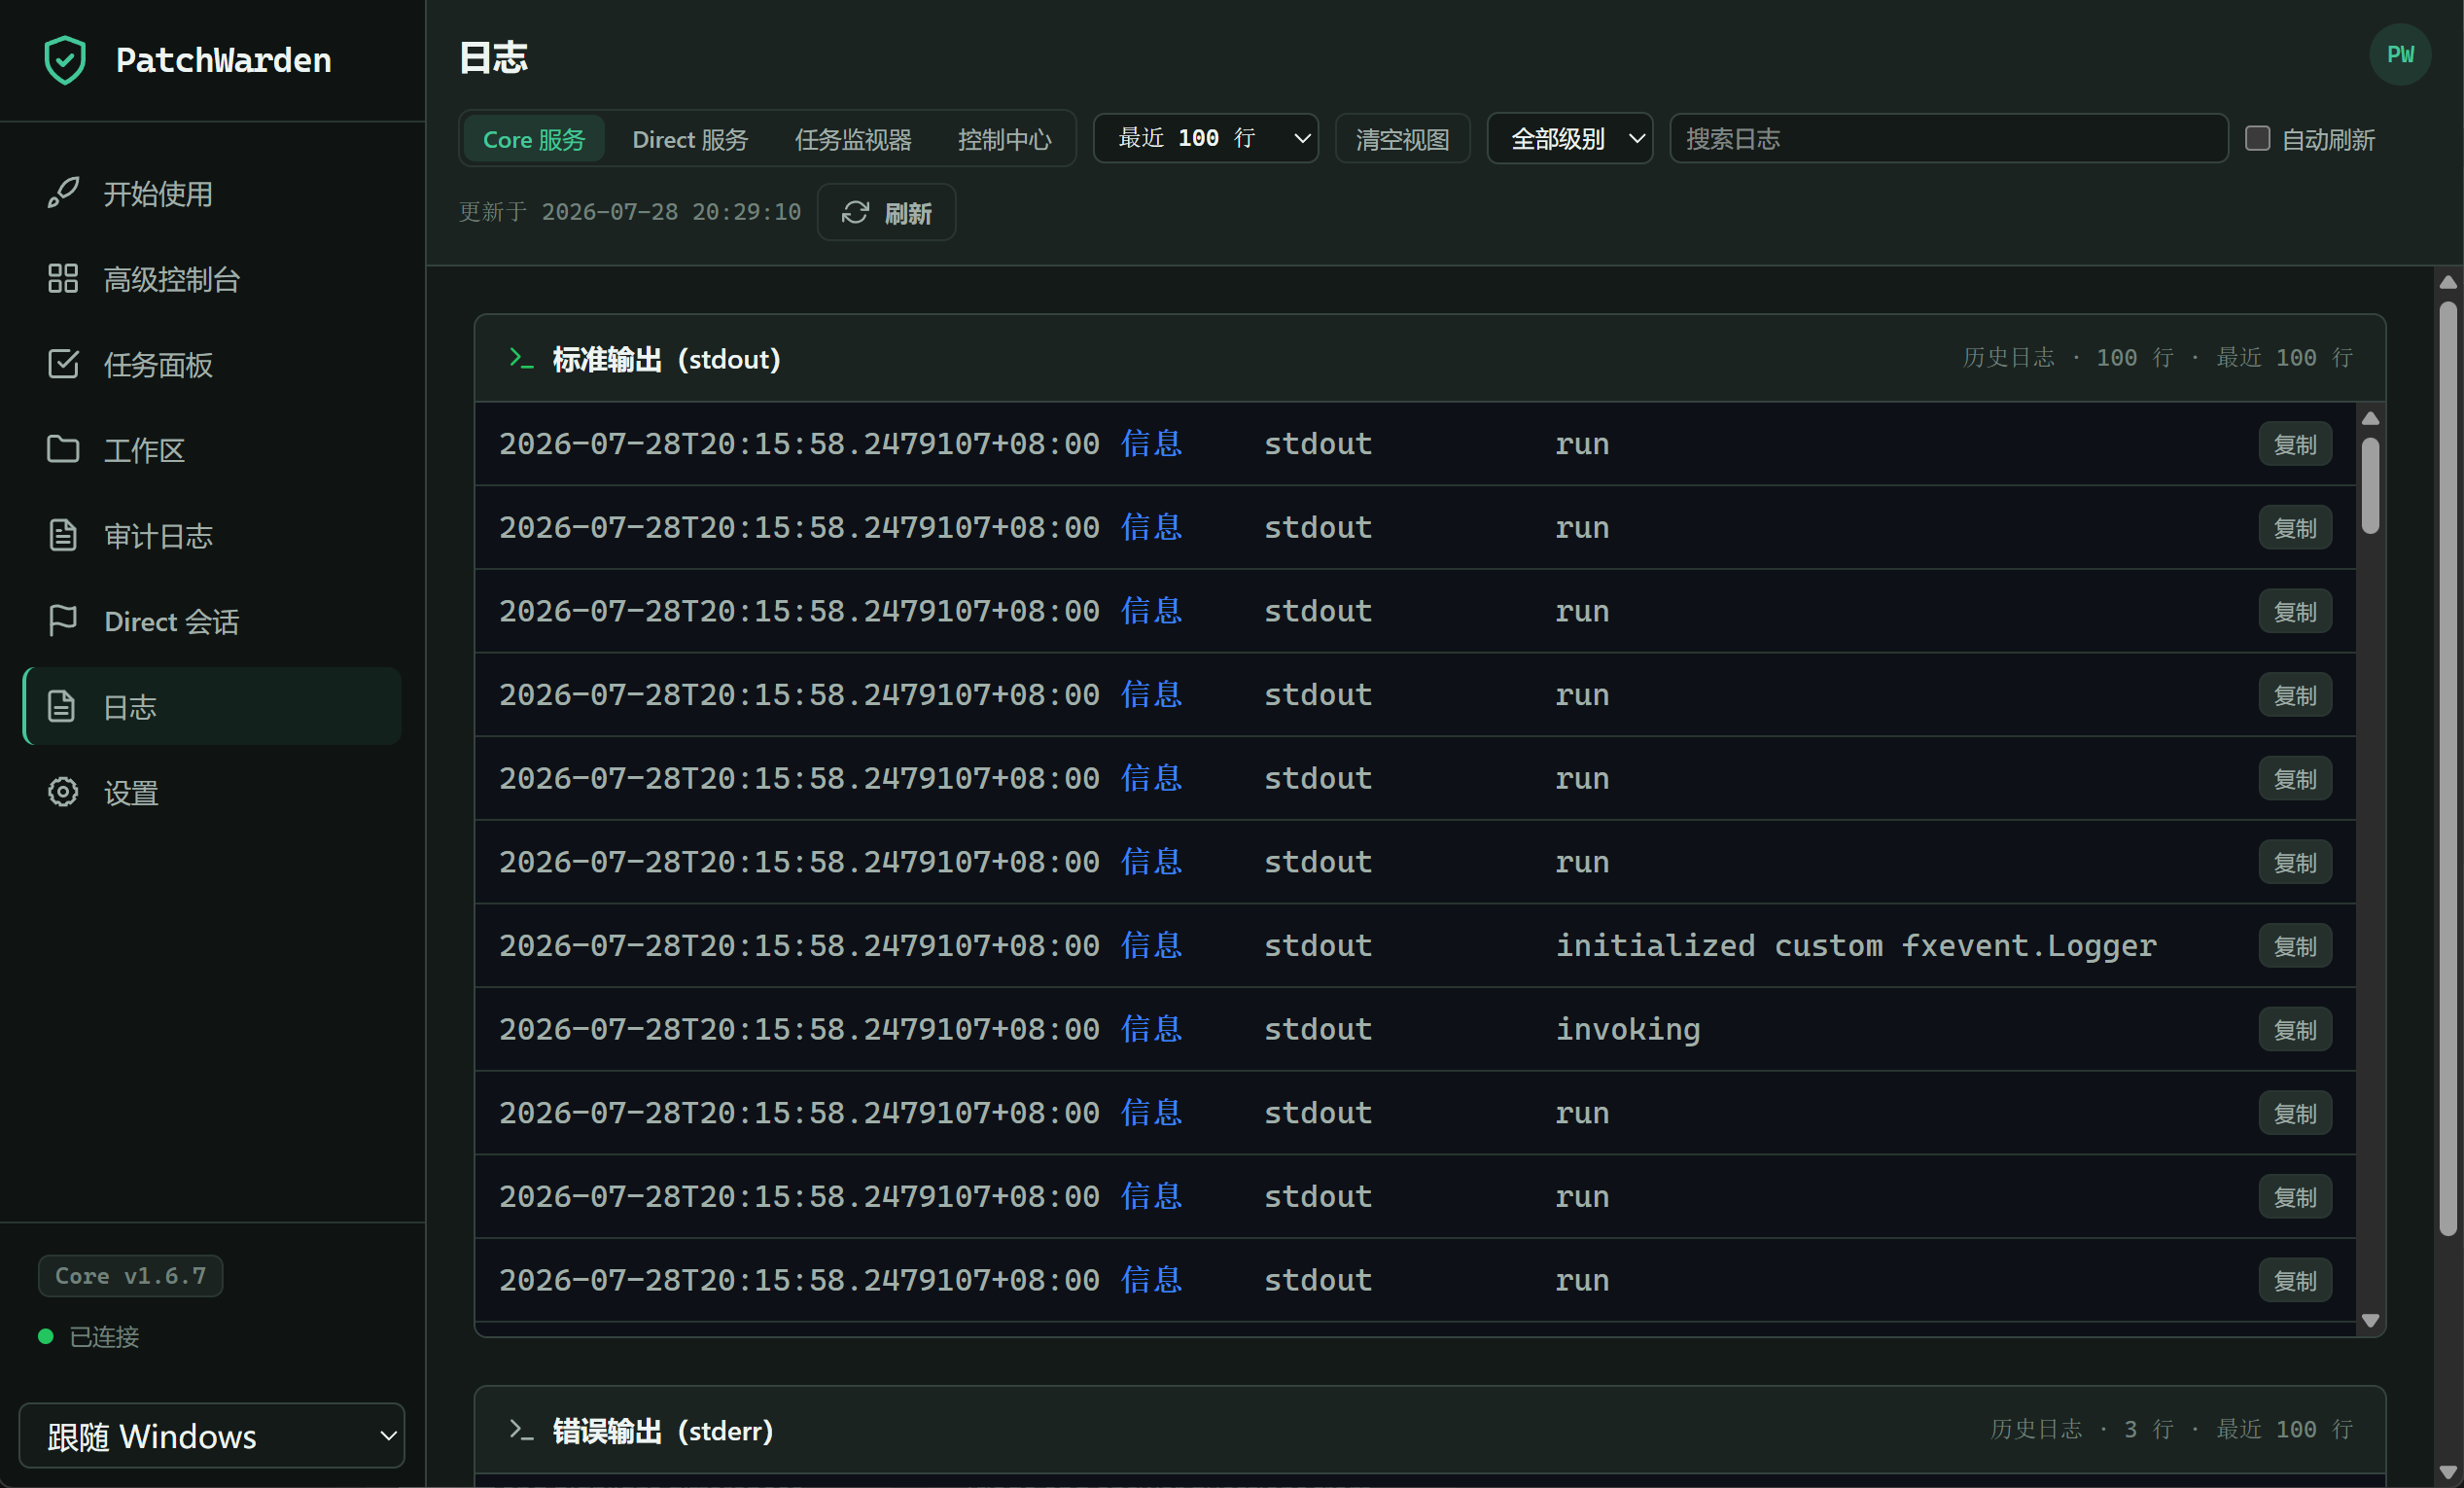
Watcher heartbeat is stale
Select Start all in Advanced Console. If it remains stale, select Restart all, wait for healthy, and run health_check again.
Old tools remain after an upgrade
Confirm the local version, refresh both plugins, close the old chat, open a new one, and compare server_version with tool_manifest_sha256.
ChatGPT cannot see the tunnel
Confirm the correct organization/workspace scope, Tunnels Read + Use for the key principal, and healthy tunnel-client and PatchWarden processes. New tunnels may need brief propagation time.
The agent appears available but immediately fails
Run the agent CLI directly and confirm sign-in and model configuration. Detect it again, then inspect failure_reason, provider_error_reference, and logs.
Is Authentication required for the plugin?
Choose No Auth for the current Secure MCP Tunnel setup. The runtime key stays in local PatchWarden/tunnel-client configuration and never goes into the ChatGPT plugin.
08 · Security
Keep firm boundaries even in the first demo
PatchWarden helps enforce scope, but you still need to state that scope clearly.
- Never publish API keys, tokens, cookies, .env files, SSH keys, or Authorization headers.
- Mask tunnel IDs, app IDs, version IDs, usernames, and private repository names when appropriate.
- Use a dedicated demo repository, not production, for the first recording.
- State allowed files, verification commands, and prohibited actions.
- Do not let a demo commit, push, tag, publish, release, or deploy automatically.
- Direct is more immediate; retain human confirmation for everyday use.
Links
Official links
Deep links and labels may change. If one moves, enter through the product's Settings page.